Author Topic: Arduino Pro Micro Atmega32 problems  (Read 5724 times)

0 Members and 1 Guest are viewing this topic.

Offline berserkfan

  • Thread Starter
  • Posts: 2135
  • Location: Not CONUS Not CONUS Not CONUS Not CONUS
  • changing diapers is more fun than model f assembly
Arduino Pro Micro Atmega32 problems
« on: Sun, 17 May 2015, 14:19:29 »
Hey folks

I have several vintage Model F boards, and while waiting for thechemist to build proper adapters for me (it's been almost a year), decided that I didn't want to spend more money on teensies so I'd try the arduino instead. It's this guy, http://i.imgur.com/lLDBHvZ.jpg (blue PCB).

Not a smart move.

I can't get them to work. It took tons of technical assistance from Dorkvader for me to even flash these things. Now Hardware and Settings can detect Soarer's Keyboard Converter.

I tried the usual scwr.exe to write my .scb file over, and it returned these messages. IE no complaints. (Note that I have two Arduinos, and I flashed one with Soarer 1.10 and the other with the 1.20beta, so the messages are slightly different.)
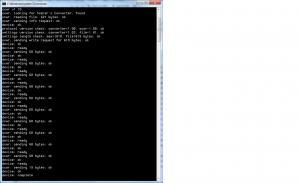
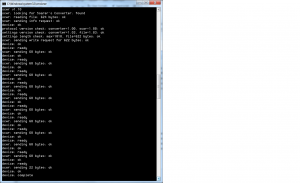
101020-0101022-1

But HID.exe returns absolutely nothing. No ff codes.

The red power light is on continuously for the arduinos.

Nothing shows up on aquakeytester.

Can assure everyone that the vintage boards work fine. I still have teensies and I have eliminated all other sources of potential error such as loose connections and what not. My Model Fs all work fine with my 2 remaining teensies. They totally fail to work with the arduinos.

Am at my wits' end, so now requiring help from people with more wit. (This obviously excludes TP4Tissue  ;D )
Most of the modding can be done on your own once you break through the psychological barriers.

Offline henz

  • * Exquisite Elder
  • Posts: 1284
  • What?
Re: Arduino Pro Micro Atmega32 problems
« Reply #1 on: Sun, 17 May 2015, 15:06:12 »
I can help you during the week i guess. To the best of my knowledge :)

Offline Findecanor

  • Posts: 5036
  • Location: Koriko
Re: Arduino Pro Micro Atmega32 problems
« Reply #2 on: Sun, 17 May 2015, 20:05:20 »
Did you bridge J1? What pins are you connecting the PS2 clock and data lines to?

Offline berserkfan

  • Thread Starter
  • Posts: 2135
  • Location: Not CONUS Not CONUS Not CONUS Not CONUS
  • changing diapers is more fun than model f assembly
Re: Arduino Pro Micro Atmega32 problems
« Reply #3 on: Sun, 17 May 2015, 21:34:59 »
Did you bridge J1? What pins are you connecting the PS2 clock and data lines to?

No. Can you explain the bridging thing again? I flashed these more than half a year ago, along with lots of instructions that DV was kind enough to provide, and forgot exactly how I flashed. I touched some part of the chip to put it in the correct mode.

Clock line is to pin2 below GND on the left side of a conventional teensy/arduino micro photo

Data is to pin3, just below Clock.
Most of the modding can be done on your own once you break through the psychological barriers.

Offline Zukoi

  • Posts: 64
  • Location: Florida
  • ****posting at 90wpm
Re: Arduino Pro Micro Atmega32 problems
« Reply #4 on: Sun, 17 May 2015, 22:28:03 »
Did you bridge J1? What pins are you connecting the PS2 clock and data lines to?

No. Can you explain the bridging thing again? I flashed these more than half a year ago, along with lots of instructions that DV was kind enough to provide, and forgot exactly how I flashed. I touched some part of the chip to put it in the correct mode.

Clock line is to pin2 below GND on the left side of a conventional teensy/arduino micro photo

Data is to pin3, just below Clock.

I don't know what bridging J1 is but I do know what to do to put the Pro Micro in boot loader. You have to connect the reset pin to ground because reset is at high normally and putting it to low will cause it to active. You can solder a button between reset and ground for a reset button (although I never done this).

I checked the pinout out of the Pro Micro and the docs of Soarer, and your pin outs are definitely correct. Maybe you mirrored the pins? Some people accidentally do that since Soarer's diagrams point away from the person rather than towards.

Maybe reflashing the controller would be your best bet if you are completely clueless.

Offline berserkfan

  • Thread Starter
  • Posts: 2135
  • Location: Not CONUS Not CONUS Not CONUS Not CONUS
  • changing diapers is more fun than model f assembly
Re: Arduino Pro Micro Atmega32 problems
« Reply #5 on: Sun, 17 May 2015, 22:36:45 »
Did you bridge J1? What pins are you connecting the PS2 clock and data lines to?

No. Can you explain the bridging thing again? I flashed these more than half a year ago, along with lots of instructions that DV was kind enough to provide, and forgot exactly how I flashed. I touched some part of the chip to put it in the correct mode.

Clock line is to pin2 below GND on the left side of a conventional teensy/arduino micro photo

Data is to pin3, just below Clock.

I don't know what bridging J1 is but I do know what to do to put the Pro Micro in boot loader. You have to connect the reset pin to ground because reset is at high normally and putting it to low will cause it to active. You can solder a button between reset and ground for a reset button (although I never done this).

I checked the pinout out of the Pro Micro and the docs of Soarer, and your pin outs are definitely correct. Maybe you mirrored the pins? Some people accidentally do that since Soarer's diagrams point away from the person rather than towards.

Maybe reflashing the controller would be your best bet if you are completely clueless.

I've built several adapters successfully at this point, and can assure you that I won't be making such an elementary mistake as the mirroring thing. I am extremely cautious about that, because I really don't want to be the humiliated noob who mixes up ground and vcc and burns his keyboard!
Most of the modding can be done on your own once you break through the psychological barriers.

Offline Findecanor

  • Posts: 5036
  • Location: Koriko
Re: Arduino Pro Micro Atmega32 problems
« Reply #6 on: Sun, 17 May 2015, 23:12:36 »
No. Can you explain the bridging thing again?
First I have to say that I have never used a Pro Micro, so I have only read up on it... because I intend to support it in a design I am working on right now.

Edit: There are two versions of the Arduino Pro Micro. One that is for 5V/16MHz and one that is 3.3V/8MHz. They have different voltage regulators. That voltage is also what the board outputs on the VCC pin.
The voltage regulator in the 5V version would ideally like more than 5V, at least 6V or so.

However, you could bypass the voltage regulator to take the power directly from USB. The chip and the VCC pin would then get 5V.
You do so by soldering together a pair of pads. They are either to the left or to the right of the USB socket. In the picture you posted, that pair of pads is marked J1.

BTW, your wiring looks correct to me.
« Last Edit: Mon, 18 May 2015, 00:29:21 by Findecanor »

Offline berserkfan

  • Thread Starter
  • Posts: 2135
  • Location: Not CONUS Not CONUS Not CONUS Not CONUS
  • changing diapers is more fun than model f assembly
Re: Arduino Pro Micro Atmega32 problems
« Reply #7 on: Mon, 18 May 2015, 08:55:11 »
Um, do you mean that because I’m using the Arduino Pro Micro without soldering together a pair of pads, it causes it to output the default wrong voltage.

Thereby not supplying enough power to the Model F, causing Model F to produce no HID codes?
 
So I have to take a tiny wire or piece of metal, solder it to the two square things on either side of J1, to ‘short’ the voltage regulator. That will make the Arduino Pro Micro work like a normal teensy?

This sounds easy to do. I just want the experts to guide me to make sure I don’t burn out anything.
Most of the modding can be done on your own once you break through the psychological barriers.

Offline berserkfan

  • Thread Starter
  • Posts: 2135
  • Location: Not CONUS Not CONUS Not CONUS Not CONUS
  • changing diapers is more fun than model f assembly
Re: Arduino Pro Micro Atmega32 problems
« Reply #8 on: Mon, 18 May 2015, 11:09:50 »
I kind of figured that I should be doing direct current on my multimeter, then found 3.52v between vcc and gnd with Model F attached.

4.55v between vcc and gnd when no keyboard was attached.

Googled and Soarer said
" With the converter connected to USB, but no keyboard attached, you should see roughly +5V on the data and clock pins of the connector (actually, those should still be +5V with a keyboard attached)." on http://deskthority.net/workshop-f7/xt-at-ps2-terminal-to-usb-converter-with-nkro-t2510.html

Does this still sound as though I should short the J1 pins?
Most of the modding can be done on your own once you break through the psychological barriers.

Offline suicidal_orange

  • * Global Moderator
  • Posts: 4771
  • Location: England
Re: Arduino Pro Micro Atmega32 problems
« Reply #9 on: Mon, 18 May 2015, 17:35:03 »
Short J1 (looks close enough to just use a blob of solder rather than playing about with a tiny wire and tweezers) then measure with the keyboard detached, if it's still 5V you're not going to burn anything by attaching it :)
120/100g linear Zealio R1  
GMK Hyperfuse
'Split everything' perfection  
MX Clear
SA Hack'd by Geeks     
EasyAVR mod