Author Topic: game controller build thread (PS Vita analog stick, Cherry Red, Leonardo, LoL)  (Read 104459 times)

0 Members and 1 Guest are viewing this topic.

Offline Camineet

  • Thread Starter
  • Posts: 287
yeah, as described in XIM community forums, PSP analog sticks are the ultimate suck.  Put in plain English, PSP sticks are vastly inferior to Vita sticks and cannot be considered as part of a project that's serious about performance along with long-term gaming and injury avoidance.  That's why so much laborious trouble has been undertaken to implement Vita sticks instead of anything else available.  There's just nothing available that compares.  Nothing.  Unfortunately.

Anyway, thanks much for posting.  Any extra attention to this project is extra attention to the aging gamer's cause, and much appreciated :-*

Offline vextanys

  • Posts: 40
Didn't realize the PSP sticks sucked so much :) I haven't got as far as hooking them up to test yet, in my "inspired by this thread but different" project. Sadly I don't think I'd be able to use a PSVita stick due to my skills and budget, so I may have to use the PS2 stick. I'll post a thread with my build when I get past the really bad prototype/breadboard stage :)

Offline suicidal_orange

  • * Global Moderator
  • Posts: 4771
  • Location: England
Looking good, the slight height increase should help you not press the nearer stick by mistake.  I laughed at your insurance estimate but thinking about it it's probably fair - it is one of a kind and has taken countless hours to refine.

If you want ideas for a case some dimensions would be good, it looks much thicker than I was imagining it would be...
120/100g linear Zealio R1  
GMK Hyperfuse
'Split everything' perfection  
MX Clear
SA Hack'd by Geeks     
EasyAVR mod

Offline Camineet

  • Thread Starter
  • Posts: 287
so I may have to use the PS2 stick.

You don't have height related real estate issues or limitations, you might want to look into implementing xbox one or ps4 analogs.  If I recall correctly from handling I think both of them in a retail big-box store a few years ago, they are both quite nice :cool:

The hardware for them however, is tall :-X

Offline Camineet

  • Thread Starter
  • Posts: 287
Looking good, the slight height increase should help you not press the nearer stick by mistake.  I laughed at your insurance estimate but thinking about it it's probably fair - it is one of a kind and has taken countless hours to refine.

yeah i'd basically have to order everything for a workshop, not just the parts for the device itself.  aaaaaaand i'd have to have enough compensation from the loss to take like 2 months off work to remake this motherf***** :'(


If you want ideas for a case some dimensions would be good, it looks much thicker than I was imagining it would be...

right, so it's 13cmx11cmx7cm

All of the crush proof cases I found that accommodate the thickness of the device also happen to be pretty damned long.  Hence, the wastefulness :'(

I'm even trying to come up with other precious items that require such protection to fill the long cases, but not having any luck :))

Offline Camineet

  • Thread Starter
  • Posts: 287
some reference photos for my keycap arrangements ;D
136477-0
136479-1

Offline Camineet

  • Thread Starter
  • Posts: 287
So next…

This job was pretty intense and required a two-person surgical team
136485-0
136487-1

The tool I bought for disassembling switches wasn't able to be used for any of the four switches.
https://mechanicalkeyboards.com/shop/index.php?l=product_detail&p=1363

I thought of cutting the tool pieces in half so they would fit into the application.  But even using pliers to pinch at the base, the tools just don't work at all to open the switches.  The angling achieved from the lengthy handles is necessary.  Therefore, I had to dig out the sides of the switch installations and manually release each latch, shimming, unlatching, and shimming again until one more latch release would get the things open.

Given the the need to access the inside of the switches again in any future revisions such as more spring changes or for doing a re-lubrication, I made a plan to slice the latches off and hold the switches together with the usual approach – clay base plus sugru shell

now i need to find out the right paint brush size to apply the lubricant and place an order :thumb:

i already got the teflon silicon :cool:
« Last Edit: Sat, 07 May 2016, 13:16:22 by Camineet »

Offline Camineet

  • Thread Starter
  • Posts: 287
springs and lubrication project is complete :thumb:

after what i'm guessing was almost 3 weeks, i was able to squeeze a game in last night and went 22/8/24 (hard carried) with the new dragon champion Aurelion Sol.  gotta love it ;D

outside leg keys are a lot easier to depress.  now i want to do this to my whole rosewill entry level mechanical keyboard with the colossal design fail of plate mount with no ability to remove the key tops without either desoldering everything (not gonna happen), or drilling out the plate clearance for each key to release its death-grip on the tops.  sandwich this you mass producing disposable lifestyle perpetuating a**hats >:D

I cleaned up the top of the device by disconnecting, trimming, restripping, and re-laying all of the wiring there in preparation for implementation of the final component - the third analog stick.

It may not look like it, but the new wiring assembly pictured below is much more flat, low-profile, compacted and ready for covering without any overly large or bulbous section needed to house the top wires now compared with what has been in place for probably over 90 days.  That was a bit of a birds nest of wires ^-^

136653-0
136655-1
136657-2
136659-3

Hopefully, true finalization of the device is coming soon.

The device is still pretty ugly, but it could've been worse and I'm very happy with it :thumb:

When it's really done, I'll do a proper high-rise photo shoot along with something like a 360° video :cool:


« Last Edit: Mon, 09 May 2016, 19:24:24 by Camineet »

Offline Camineet

  • Thread Starter
  • Posts: 287
august 13th, 2015.  wow, nearly a year to reach this point.  another hard day of work on the device, and it's all but complete :thumb: 

i just have to cover the wire assembly on top and the yellow analog wires, and i think the device really is finished :))
136861-0
136863-1


so yeah, 3rd analog is in place and working.  after so much toil and perseverance, and months, and money (i swear this thing cost $400 or more even though i didn't keep a strict tally)... i'm somewhat astounded to see all 3 analogs working and mapped for supreme league of legends control :cool:

136865-2
« Last Edit: Wed, 11 May 2016, 15:13:36 by Camineet »

Offline suicidal_orange

  • * Global Moderator
  • Posts: 4771
  • Location: England
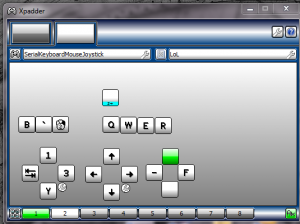
What's with that Xpadder layout, two rows of four keys too sane?  Glad to hear it's all working though, I guess you'll be off round the world playing games soon!

Looking at cases the smallest I found was this one but it has no padding or handle, this one and this one are a bit bigger all round but have foam, handles (and the first one is available in orange so it must be good :)))
120/100g linear Zealio R1  
GMK Hyperfuse
'Split everything' perfection  
MX Clear
SA Hack'd by Geeks     
EasyAVR mod

Offline Camineet

  • Thread Starter
  • Posts: 287
oh hell yeah i never saw that orange one before

yeah, it's orange so it must be good :thumb:  just ordered it :))

Offline sinusoid

  • Posts: 160
  • fd > ESC
Mmmm... This thing brings back memories...  :))

137003-0

I'm enjoying the build process a lot. Sugru really shines as a prototyping material here I think, when you make a working device that can both withstand regular use and still maintain modifiability.

Also, an organic design developed through a kind of an evolutionary process, I love that a lot! :D

Offline Camineet

  • Thread Starter
  • Posts: 287
oh wow, i never had a reason to look and see what bungie's 1st game was like.  sorry i missed that one as i was strictly on consoles in tha nine 'fo ^-^

so the device looks like that gun in the game eh?  if it's a gun made of alien genitals, then i'd guess they're similar looking indeed :))

oh yeah, sugru is outstanding for this kind of thing especially with the clay base.  to modify, you just have to make shallow cut, peel off the sugru shell, and start digging out and reshaping whatever :cool:

Another note about the Sugru and Clay combination.  It does in fact make for a durable structure.  Although Clay can be soft and squishy, as it's designed to be, when Clay is backed up against another material or just up against more clay, it becomes very strong and solid.

My device can be grabbed firmly without much worry and even dropped although I haven't done so yet and hope not to :-X

Offline Camineet

  • Thread Starter
  • Posts: 287
high rez photo shoot and action videos.

My sugru work became more sloppy in the end as i had large areas to cover and have need to move on with other of life's projects  ;D

let me know if this page is loading too slow due to the high rez photos and if there's any method i should use to improve it.  i chose the usual 'inline expandable thumbnail'

137226-0

137228-1

137230-2

137232-3

137234-4

137236-5

137242-6

137244-7


137262-8

137264-9

137266-10

137268-11

137270-12

[ Specified attachment is not available ]


« Last Edit: Mon, 16 May 2016, 13:58:22 by Camineet »

Offline suicidal_orange

  • * Global Moderator
  • Posts: 4771
  • Location: England
Seems your measurements were a little off, the case could have been smaller.  It looks suspiciously red too...

Seriesly though that looks perfect in your hand and well deserving of a big cosy box to live in.  I hope it brings you many hours of pain free gaming :thumb:
120/100g linear Zealio R1  
GMK Hyperfuse
'Split everything' perfection  
MX Clear
SA Hack'd by Geeks     
EasyAVR mod

Offline Camineet

  • Thread Starter
  • Posts: 287
lol, thanks Orange, your support and good humor has been great this whole trip :-*

Yeah, why does the box and my spiderco dragonfly look so darned red these pics? :-X

They are both bright orange IRL :cool:

Offline Camineet

  • Thread Starter
  • Posts: 287
Hey guys, got a pretty cool update :cool:

After installing 35gm Springs and lubricating the switches on the outside keys leg, I found the need for even less actuation force.

I actually severed off around 25% of the length of the Springs.

Users who have switched out Springs to lower than stock have reported mushy performance.

I cannot disagree with their findings.  Certainly, the responsiveness of the keys is greatly reduced.

However, I have brought down the actuation force and required amount of travel to practically nothing.  For my usage case, this change is extremely desirable.

Now, the red switch piece actually sags into the housing of the switch due to the shortened spring and actually resides just above the point of actuation.  The required distance to travel in order such that the switch is activated is so little and requires so little force, that essentially just brushing the outside keys with the backs of my fingers activates them.  I could not be more thrilled with this kind of performance

As anyone who has read this thread knows, combat performances certainly important to me.  However, of primary importance is my ability to continue playing the wonderful game league of legends injury free for the foreseeable future.

Prior to implementing the new springs in the switches, I was already starting to experience potential future injury issues from hitting the outside keys with the backs of my fingers due to my age and the natural limitations of the human hand.  At this point, hitting the outside leg keys requires little more actuation force than just lifting my naked fingers.

Also, when it comes to the outside keys, I don't need super amazing responsiveness.  The functions mapped to those keys are not directly for combat.   one of them is my alt keymap key.  One of them is left mouse click, one of them is for pings, and one of them is the return to base or back key.  None of these require double tapping or any kind of rapidfire activity.


In other news, I have recently lost one axis on the analog stick that employs the new type mod from W11cE.  You can see the stuck axis here:
138767-0

Fortunately, I still have enough functionality to be able to play the game without significant compromises such as having critical in-game actions only available on alt key maps.

Still, having the crippled analog stick working again is highly desirable because it gives me the chance to have a wider array of items with so-called active functions (items that don't just give you armor, but also have an ability built in that slows enemies or something on activation ).

I therefore would like to move forward with my plan to try soldering stranded cable directly onto the fingers (pinouts) of the PS vita flat cable.

I have recently sent a message to W11cE asking if he by chance knows what the pinouts are for this particular PS Vita 2000 analog stick that has fewer pins than the original PS Vita analog stick.  Just 4 instead of however many, I guess six, on the original.

I hope to be able to solder stranded cable directly onto the pinouts of this analog's flat cable:

http://www.amazon.com/Black-Analog-Joystick-Control-Stick/dp/B01DG4DXNC?ie=UTF8&colid=3P81QSPM8JCMR&coliid=I3RGJM7C1JQSRO&ref_=wl_it_dp_o_pC_S_ttl

I'm wondering if I can get anyone to chime in on the theory behind this plan.  It is as follows.  It is only necessary to achieve connection between the pinouts on the PS vita flat cable and the teensy board.  It doesn't matter how the connection is made, as long as it's clean.  The mods made by W11cE simply achieve this necessary condition.  There is no other functionality or anything else taking place in the mods.  They simply create an electrical connection between two points.  There isn't anything like resistors or capacitors or anything else working in there.  Does this sound right to you guys?

I have a teensy board and the PS Vita 2000 analog stick on my Amazon wish list and am planning on an experimentation project with those pieces to try to get them connected and working sometime in the next 60 days.  Working on this particular experiment separate from the controller using newly purchased components is desirable because revisions require demolition and teardown activities followed by reforming which puts me out-of-game for as long as a week at a time (and can result in damage to existing working mods) :-X

And even other news, I recently got pretty involved with the steam controller.  I plan to take a break from league for at least one week out of every month to rest my hands.  Regardless of how forgiving my controller device is, it's wise to switch things up as much as possible.

My steam controller is out for repair because I spilled a full glass of water onto it that miraculously managed to empty its entire contents directly into the face of the controller and a great deal of water went into the spaces around the buttons and such filling the controller.  My steam controller was temporarily able to be used as a water dispensing container :-[

At any rate, I'm happy to report for anyone searching for low-impact gaming options that the steam controller using gamermuscle's Config that employees both the right trackpad and the accelerometers for pointer control together along with various other config tweaks I have made results in what is surely the lowest impact gamepad style gaming experience available.  I got started with Paragon from epic games, and also plan to purchase overwatch.

anyway, thanks as always for reading ;D

Offline hanya

  • Posts: 132
  • Location: Japan
I have recently sent a message to W11cE asking if he by chance knows what the pinouts are for this particular PS Vita 2000 analog stick that has fewer pins than the original PS Vita analog stick.  Just 4 instead of however many, I guess six, on the original.
It's different from PS Vita 1000, see:
http://www.alps.com/prod/info/E/HTML/MultiControl/Potentiometer/RKJXY/RKJXY1000006.html
PFU HHKB JP, Sanwa MA-TB38 trackball

Offline Camineet

  • Thread Starter
  • Posts: 287
thanks hanya :D

いつも手伝って頂いて有難う!

Offline Camineet

  • Thread Starter
  • Posts: 287
Hi guys, I received the ps vita 2000 analog stick, and the required actuation force is so much higher than the ps vita 1000 analog stick that I'm just left disappointed and shaking my head :(

I will need to attempt to do the direct soldering job on the ps vita 1000 analog flat cable pinouts, which will be more difficult but appears to be something I can handle.  Can I trouble somebody to please tell me the pinouts for the ps vita 1000 analog ?

I know that I should be able to guess what they are from reviewing W11cE's original tutorial on XIM forum, but it would be nice if I could get confirmation of exactly which of the pins must be combined for power along with what the other pins are for before I start cutting and soldering the flat cable :-*

Offline Camineet

  • Thread Starter
  • Posts: 287
Hey guys, I just remembered that I need to present a diagram with my question about the pinouts so that we don't end up with an orientation miscommunication :-X

Can someone please let me know what 1 through 6 are for?

140550-0

Offline suicidal_orange

  • * Global Moderator
  • Posts: 4771
  • Location: England
Using W11cE's pic this is the order, assuming your connector is pictured with the stick bent to the left at the top of the cable.  I'm also assuming it's 5v but if you're running the others on 3.3v go with that.


1 - GND
2 - X
3 - Y
4 - 5v
5 - [empty]
6 - 5v

There's speculation here that [empty] should be a second GND and it is pictured as going into the stick so should probably be something...
120/100g linear Zealio R1  
GMK Hyperfuse
'Split everything' perfection  
MX Clear
SA Hack'd by Geeks     
EasyAVR mod

Offline Camineet

  • Thread Starter
  • Posts: 287
Oh yeah, I shouldn't have made the pic so small.  Here's a better version

140553-0


Offline Camineet

  • Thread Starter
  • Posts: 287


There's speculation here that [empty] should be a second GND and it is pictured as going into the stick so should probably be something...

I've seen that post a few times, probably going back as far as months ago.  It seems to not have any real answer to what the actual pinout is.

I'll probably end up pestering Hanya or W11Ce for the answer with PMs if one of them doesn't pop in here within a week or so.  I don't want to start cutting and soldering without hearing from one of them ^-^

Offline W11cE

  • Posts: 23
Using W11cE's pic this is the order, assuming your connector is pictured with the stick bent to the left at the top of the cable.  I'm also assuming it's 5v but if you're running the others on 3.3v go with that.

Show Image


1 - GND
2 - X
3 - Y
4 - 5v
5 - [empty]
6 - 5v

There's speculation here that [empty] should be a second GND and it is pictured as going into the stick so should probably be something...

Almost:
1 - GND
2 - X
3 - Y
4 - 5v
5 - 5v
6 - 5v

The small trace goes to pin 5 under the connector.

Wouldn't even say speculation. More like just a guess.

Offline Camineet

  • Thread Starter
  • Posts: 287


Almost:
1 - GND
2 - X
3 - Y
4 - 5v
5 - 5v
6 - 5v

The small trace goes to pin 5 under the connector.

Wouldn't even say speculation. More like just a guess.

fabulous, thank you :-*

Offline suicidal_orange

  • * Global Moderator
  • Posts: 4771
  • Location: England
Using W11cE's pic this is the order, assuming your connector is pictured with the stick bent to the left at the top of the cable.  I'm also assuming it's 5v but if you're running the others on 3.3v go with that.

Show Image


1 - GND
2 - X
3 - Y
4 - 5v
5 - [empty]
6 - 5v

There's speculation here that [empty] should be a second GND and it is pictured as going into the stick so should probably be something...

Almost:
1 - GND
2 - X
3 - Y
4 - 5v
5 - 5v
6 - 5v

The small trace goes to pin 5 under the connector.

Wouldn't even say speculation. More like just a guess.

Thanks!  Don't suppose you could make the pins in the pic in your guide the same colour as the traces they connect to so it's obvious?
120/100g linear Zealio R1  
GMK Hyperfuse
'Split everything' perfection  
MX Clear
SA Hack'd by Geeks     
EasyAVR mod

Offline Camineet

  • Thread Starter
  • Posts: 287
Hey guys, I got it on the first try :p

Here's the step-by-step process:
First, make the cuts with wire cutters
140778-0

Next, change soldering iron tip to a very small and pointy one
140782-1

Next, set up the two pieces to be joined on a piece of clay to hold them in place
140780-2

Next, lamely poke around with soldering iron and solder until the moment when for whatever strange reason (i'm always facinated how soldering seems to work after a while of poking at something) the two pieces snap together like magnets and fuse
140784-3

After the first wire is connected, cover the connection in gel cyanoacrylate like this found here in the states and probably elsewhere

https://www.amazon.com/gp/product/B003Y49R7G/ref=oh_aui_search_detailpage?ie=UTF8&psc=1

Wait two hours or so for the glue to dry enough so that it's no longer tacky.  Solder the next connection by repeating the same clumsy fumbling poke around and cover with glue.  When gluing, put enough glue to attach the first set of connections to the second.  Repeat for connections three and four until you get a cluster of connections covered in glue.

140786-4
140788-5

Next, connect to teensy and then PC while holding breath and praying.  Mine worked 1st time ;D  If failure, buy another vita analog stick and try again.  they're only about 10 dollars ;)

I'll cover the entire assembly with sugru in the coming days to entomb the assembly as I always do with these jobs to make it shockproof, and largely crush proof and bend proof :cool:
« Last Edit: Sun, 26 June 2016, 10:43:54 by Camineet »

Offline Camineet

  • Thread Starter
  • Posts: 287

Offline W11cE

  • Posts: 23
Nice work with the soldering  :thumb:
I wouldn't have ever believed you can solder that thick wires without breaking the ribbon cable.

Offline Camineet

  • Thread Starter
  • Posts: 287
hey can any of you guys do me a favor and tell me where i can buy the black plugs i'm looking for pictured at the end of this post?

https://geekhack.org/index.php?topic=83060.msg2217124#msg2217124

Offline Camineet

  • Thread Starter
  • Posts: 287
the 3rd vita analog on the unreliable mod had 1 axis die 60 days back followed by death of the other axis friday evening.

once again, the clay base with sugru shell pays off.  just make a cut or 2, peel off the sugru, and go digging for about 20 minutes.

142634-0

142636-1
in one long work session saturday (maybe 3 hours), i replaced the bad mod with my recent direct flat cable soldered one and played league saturday night. 

i sure am glad i had already put together that new vita mod soldering job a few weeks back :-X

Offline Camineet

  • Thread Starter
  • Posts: 287
i've still got Esc, dance, laugh, and mastery flare on an alt keymap :mad:

there's still room for one more analog stick closer to the base of my thumb.

someday... :cool:

Offline Camineet

  • Thread Starter
  • Posts: 287
Re: game controller build thread (PS Vita analog stick, Cherry Red, Leonardo, LoL)
« Reply #383 on: Fri, 09 September 2016, 17:35:42 »

I know this is a super old thread but just wanted to thank all of you. I've been meaning to use the PSVITA sticks in one of my own builds and the pinout and info in this thread has been invaluable. Here's a pic of my own breakout. Its straight from a cellphone in bad lighting but I'm super stoked that this worked!

168497-0

Offline Camineet

  • Thread Starter
  • Posts: 287
very nice solution :)

that cellphone part might looks like a good option. where did you get it?

Sorry, posted too late last night. What I meant was the pic was straight from a cellphone and thus the crappy picture quality. :) I drew up the circuit board and made the pcb through OSHPark. I soldered on the connector myself.
« Last Edit: Tue, 16 May 2017, 20:20:09 by specializationisoverrated »

Offline vextanys

  • Posts: 40
Part info about the socket would be nice - I tried to find something but had no idea which of the parts I found would fit (and wasn't confidant that I could solder the thing anyway)


Offline ndstudio

  • Posts: 2
I have been following this PS Vita Analog stick mod for a bit and finally tried to give it a stab but for some reason when I wire everything up all I get are random values with the Teensy LC that I'm using. Ive tried different connectors and techniques and have tried different arduino test sketches but its always the same. Any ideas??

Currently using:

1 - GND
2 - X
3 - Y
4 - 5v
5 - 5v
6 - 5v

Never mind, I tried the splicing technique above and it worked great. I think my issue was that using a socket connector either wasn't soldered correctly or the connection was too weak.

Offline Camineet

  • Thread Starter
  • Posts: 287
just dropping this pic in here as a reference259978-0

Offline doublethink665

  • Posts: 7
  • Location: right behind you!
Thank you!
This project looks awesome.
I made my own controller using a leonardo years ago and I used the lame arduino joysticks, which work, but are not great. I'm going to revisit it and learn from your example. I'm going to get some sugru, too. Right now I just have parts wired to a prototyping board and I hold the board. sugru will help a lot.

Offline hanya

  • Posts: 132
  • Location: Japan
RKJXY joystick has been marked as not recommended for new designs by the manufacturer.
PFU HHKB JP, Sanwa MA-TB38 trackball

Offline Camineet

  • Thread Starter
  • Posts: 287
RKJXY joystick is absolute trash. But the pinout is the same as the good ones. And there are no pics of the pinouts of the good ones.

Offline Camineet

  • Thread Starter
  • Posts: 287
Hanya, do you know where to buy the plug in the picture above?

Or do you know of any similar product that the newer PSV 2000 cables can be connected to?

Offline Camineet

  • Thread Starter
  • Posts: 287