Hi guys, I was talking to someone on skype and they convinced me to start posting pics of my projects again so here's one for you.
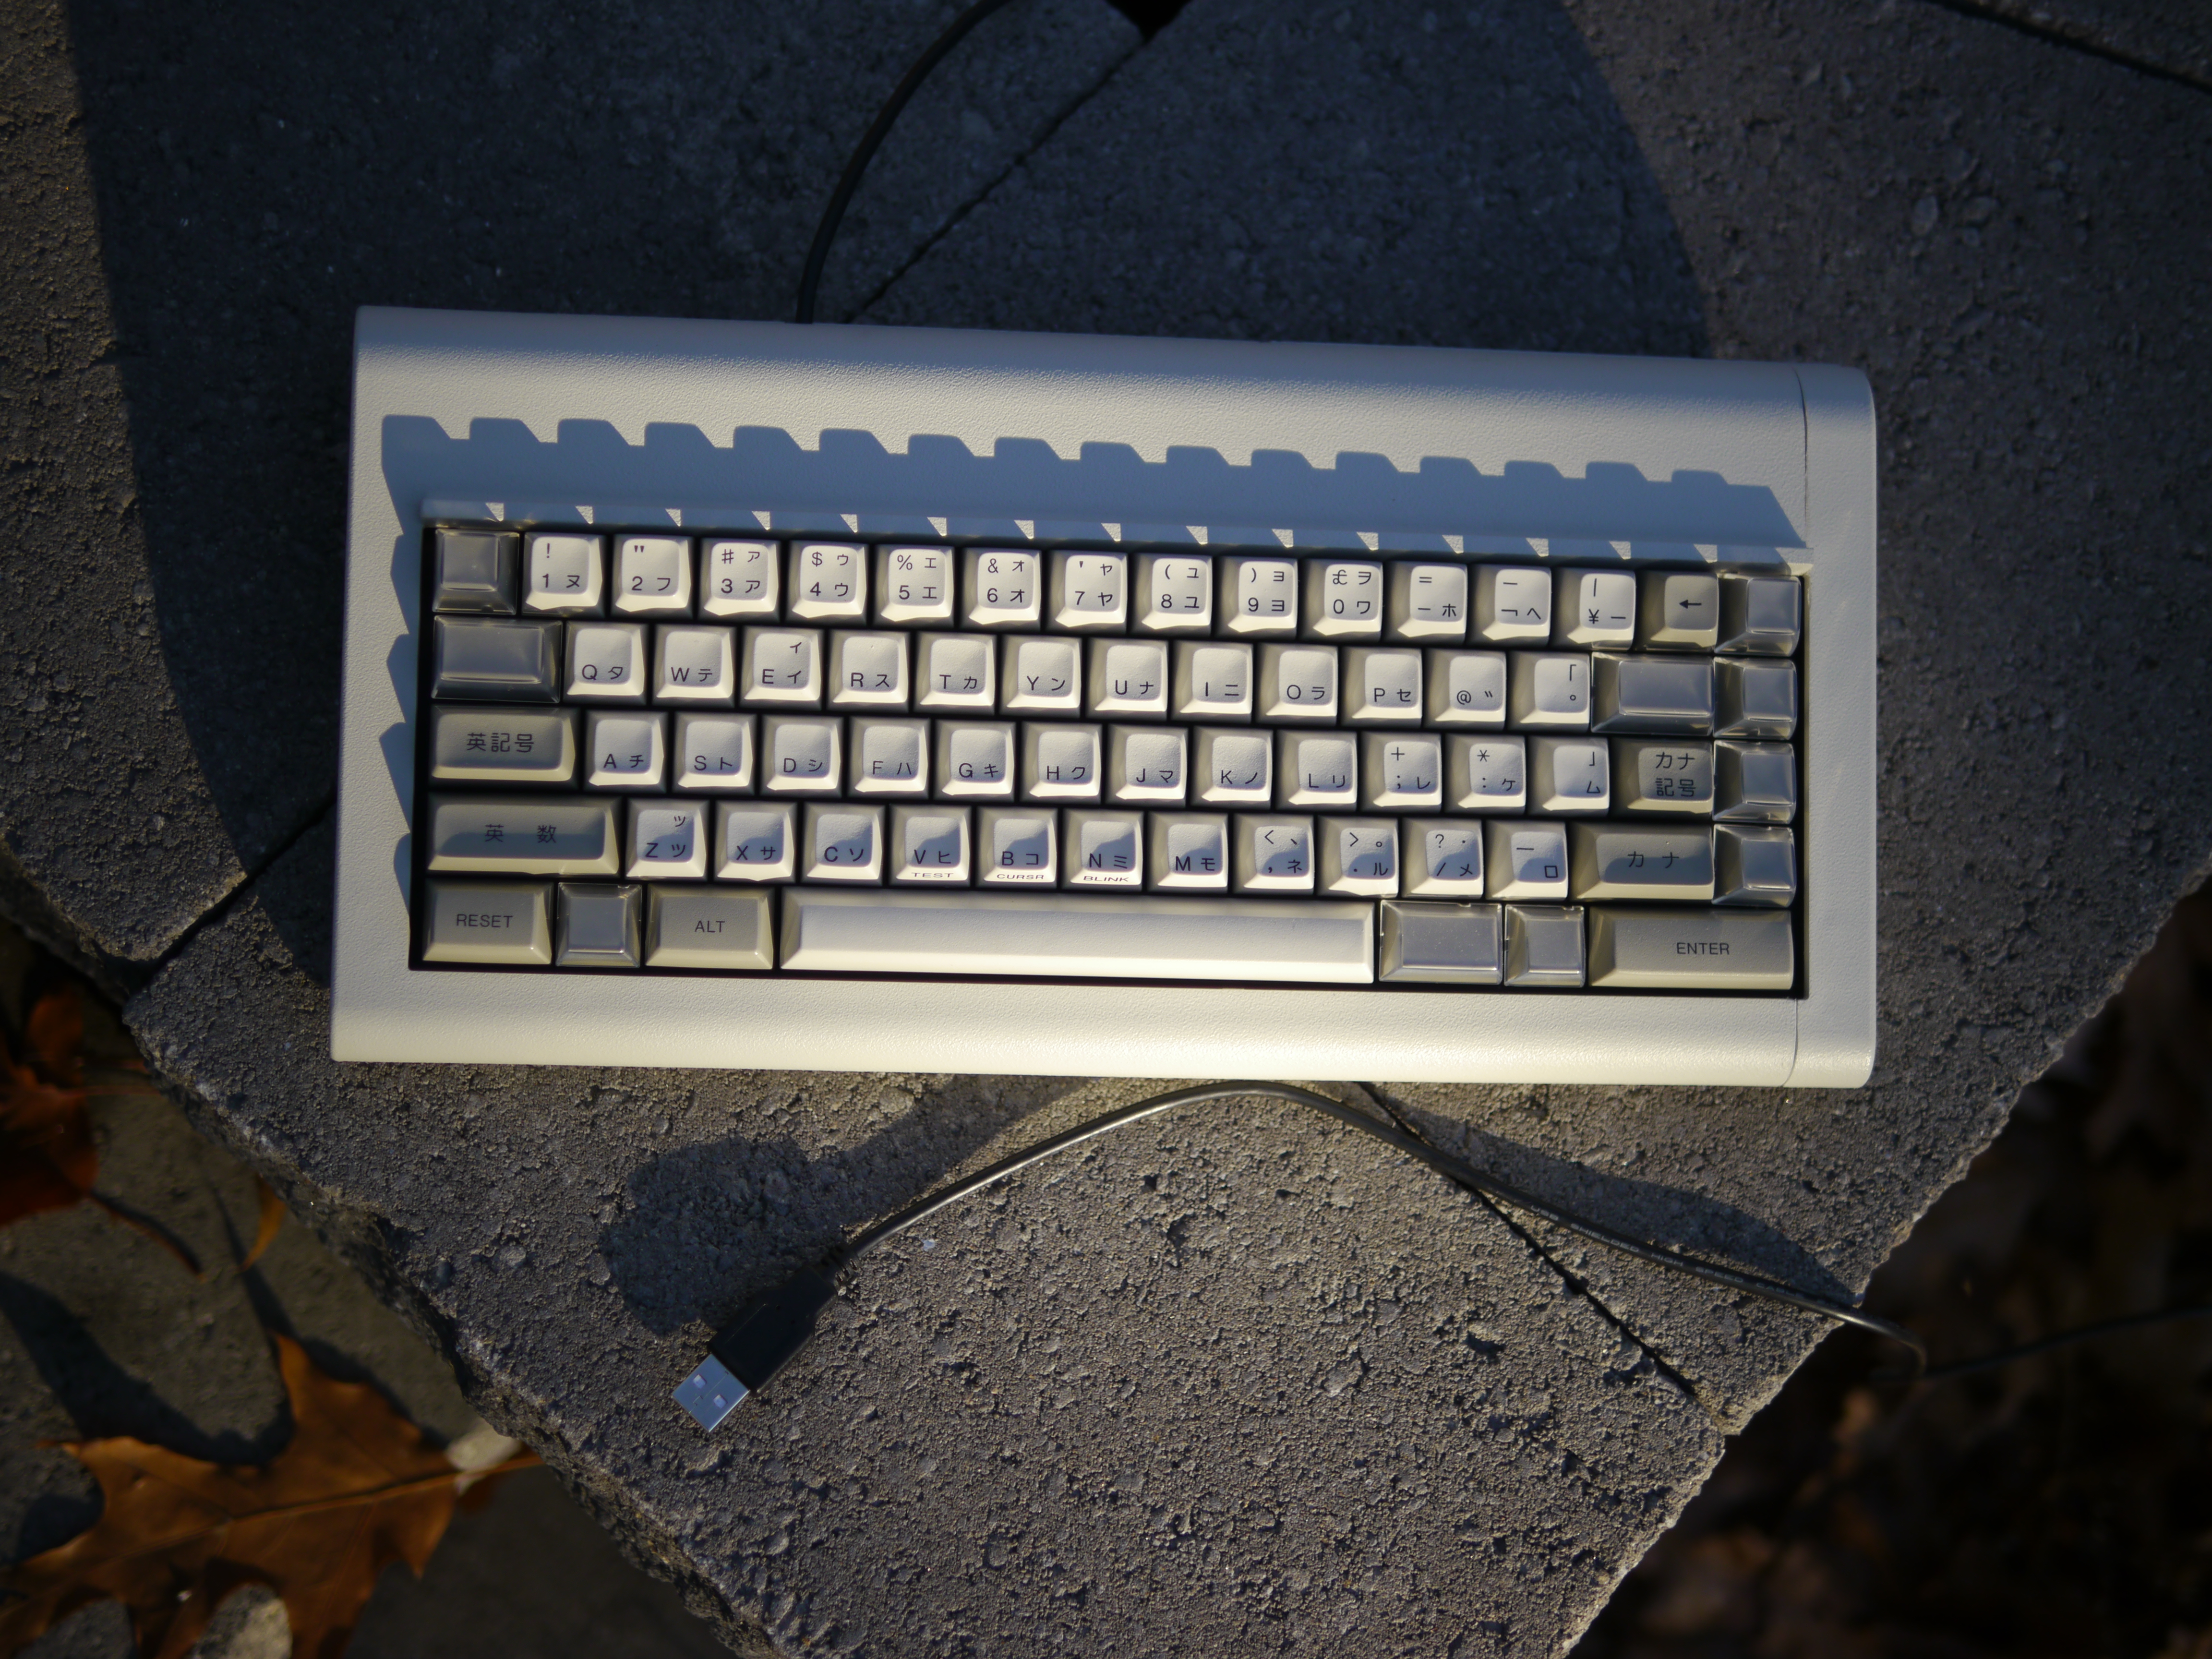
I love the IBM Chinese / Japanese keyboards (6112884 for Japanese, 6113442 for Chinese). Mendleson's has like a huge stash of them, they are NIB, IBM, tee mount (green) alps, have NKRO, and are also cheap. How cheap?
$25 NIB IBM Alps! Everyone should own one. Soarer even made a controller code for it, which was sweet. Unfortunately they are huge. I decided to fix that.
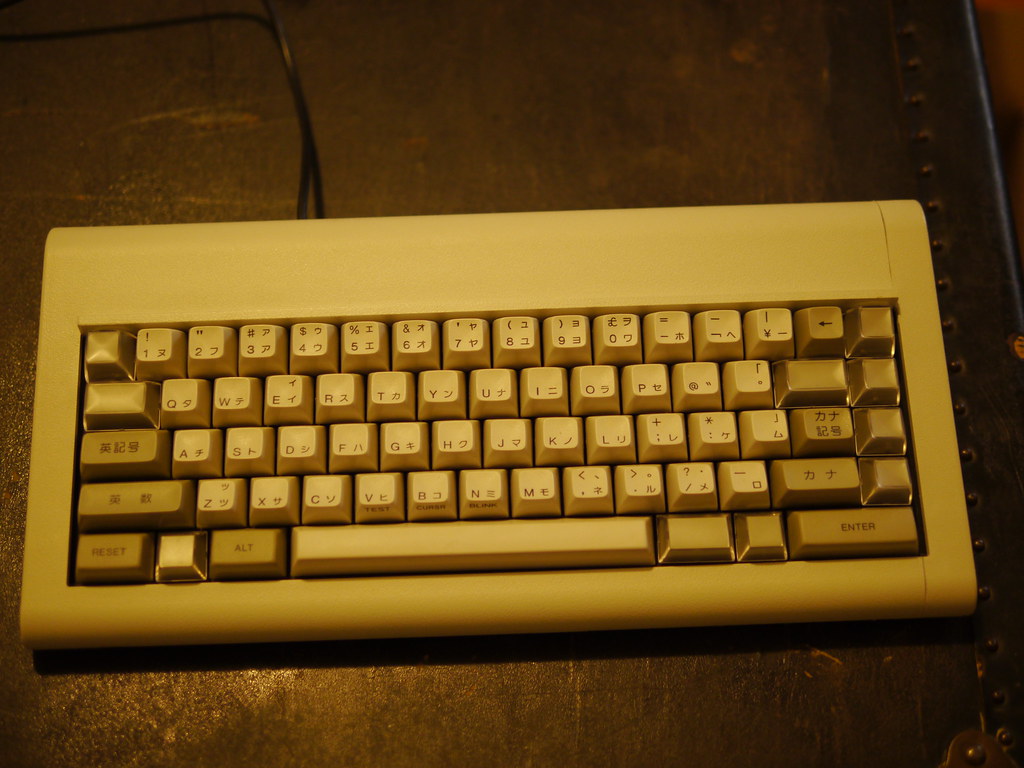
What did I do? I cut the last two "sections" off the plate, cut a section out of the bottom case, cut a different section out of the top. I'm very glad I was able to preserve the places for the feet to clip back in as well as the speaker grill. I spent many hours filing the 4 edges down to match together perfectly, or as good as I could get. Then I decided whether to keep the PCB or not. The original PCB had NKRO, but the controller was on the part I cut off. I also really like the lowpoly-type M0110 mod where it's just direct wired, but I still need a place for the controller. hmm.
I ended up keeping the PCB. I cut it down to size, desoldered the mux chip driving the columns (which was on the part of the KB that was left) put a teensy there, fixed a few traces to power the teensy, repaired all the traces that were cut, mapped out the matrix, came up with a layout and bam!
The KB is sometimes known as the pingsaver keyboard. Since I desoldered mine I can confirm that it's the metal plate that makes the ping. This ping has been preserved in this iteration which is good 'cause I love it.
The tee mount alps actuate very high. Most people consider them linear, but I've always thought they were a little tactile. I use it for gaming or my "left hand only" ergodox depending on how I'm feeling.
Here are a couple of cellphone photos I took, I guess since I have a post now I'll take some interior shots too.
I have a few other projects in the works, so hopefully I'll find time to post those too
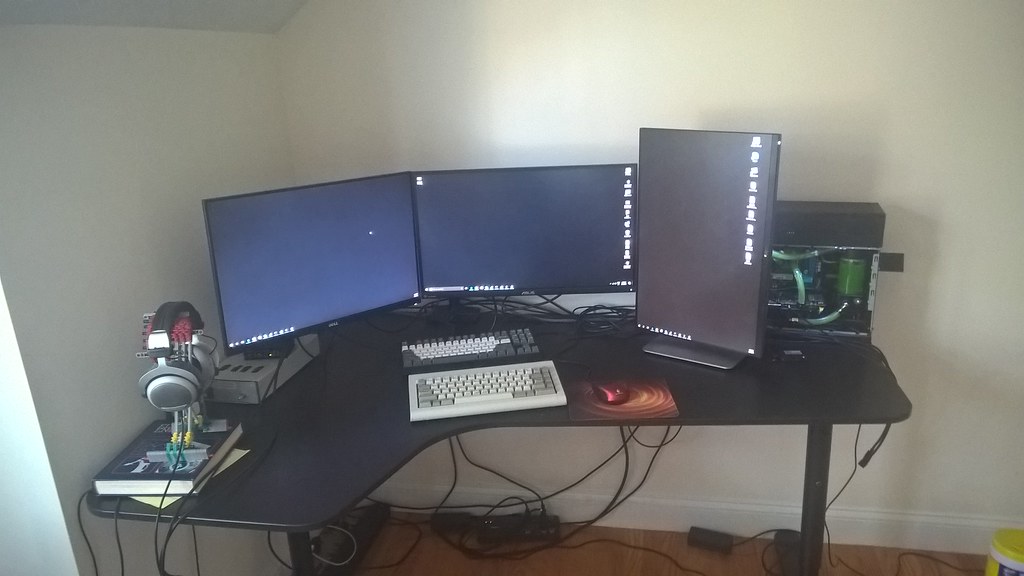
Next to a CM storm novatouch. The whole thing is about the size of a standard TKL
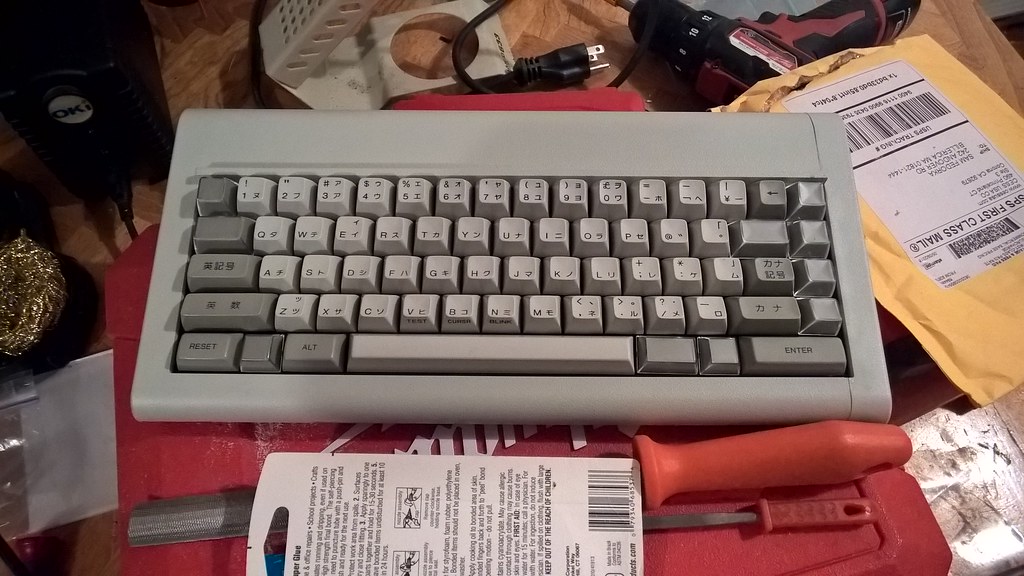
This picture is actually taken right after I finished the case, so it's not even working in the photo

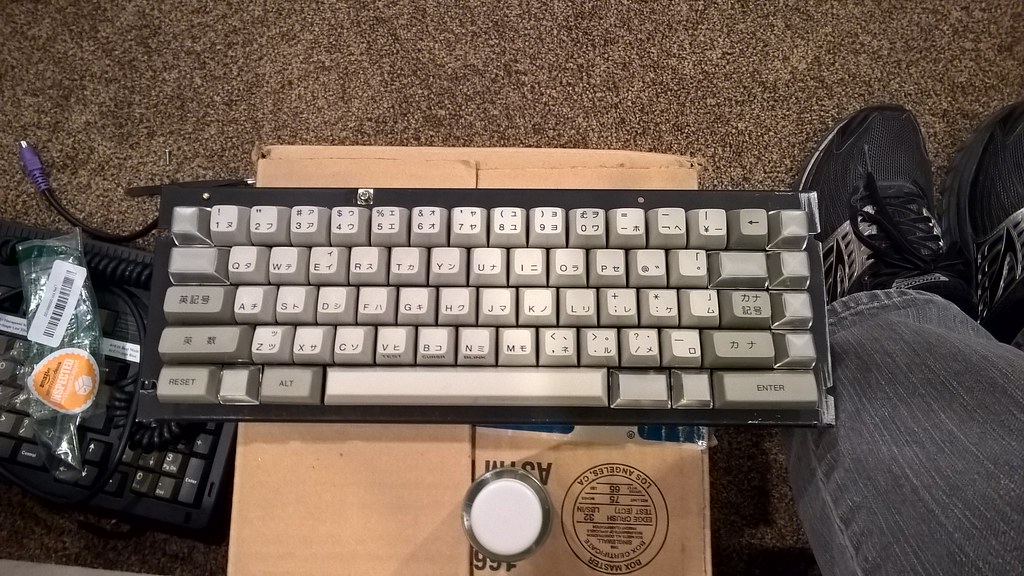
This is the only shot of the internals I could find. Again missing any sort of wiring as it's an early photo.
I guess I'll take some photos and upload them later. Enjoy!
New pics. Unfortunately it rained all today and I loaned out my good tripod so we get terrible WB and ugly pics. I'm too lazy to fix because I'll just take better ones later
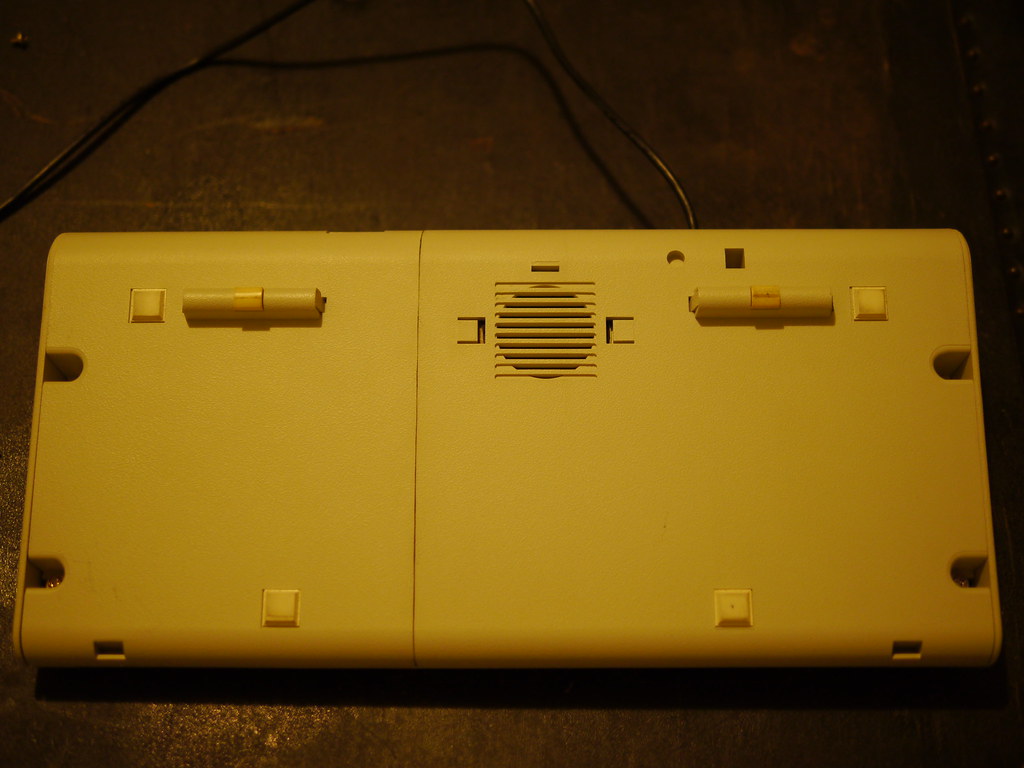
Here we see the bottom seam and how much it varies from the top. The advantage is that I can keep both feet and the speaker grille The disadvantage is that two case tabs on one side won't fit. I decided that's acceptable as it has 4 screws in it anyway
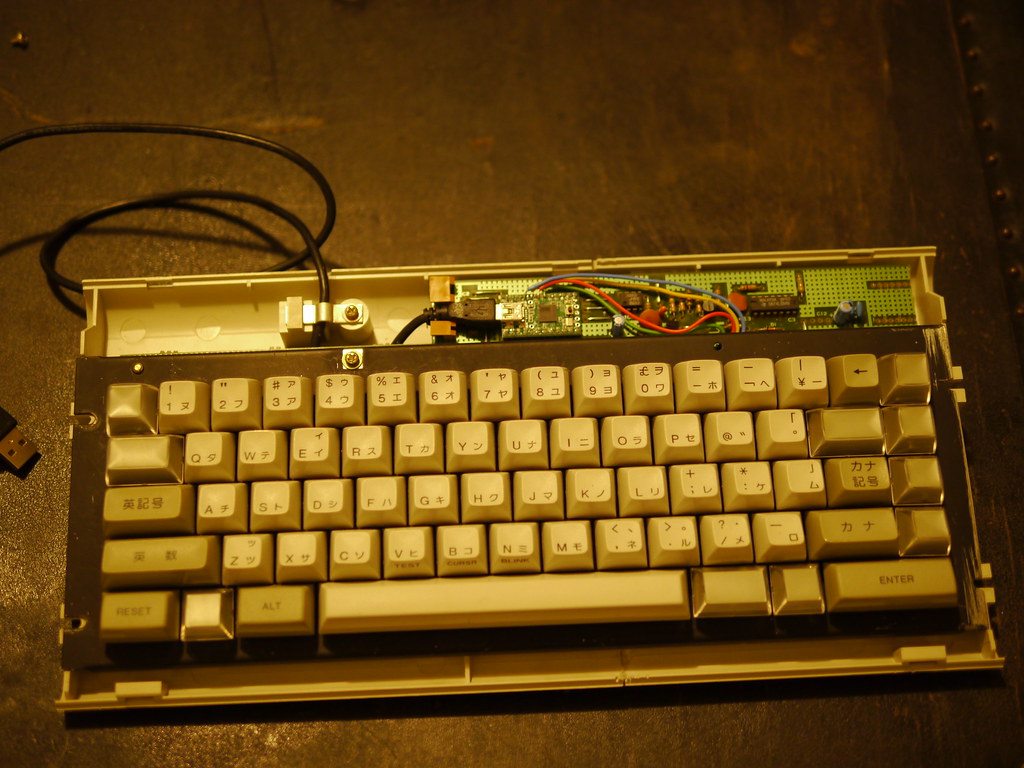
Here it is with the top off (oh my!) you can see the bright wires, which are the columns from under the board. This teensy used to be in the IC socket and therefore was missing some pins for that purpose. I found it easy and elegant to fix it this way. I also preserved the internal strain relief for the cable which was pretty legit. The speaker plugs in and does work if I connect it to the teensy but I opted against. I had to route the colored ones in between switches between the PCB and plate.
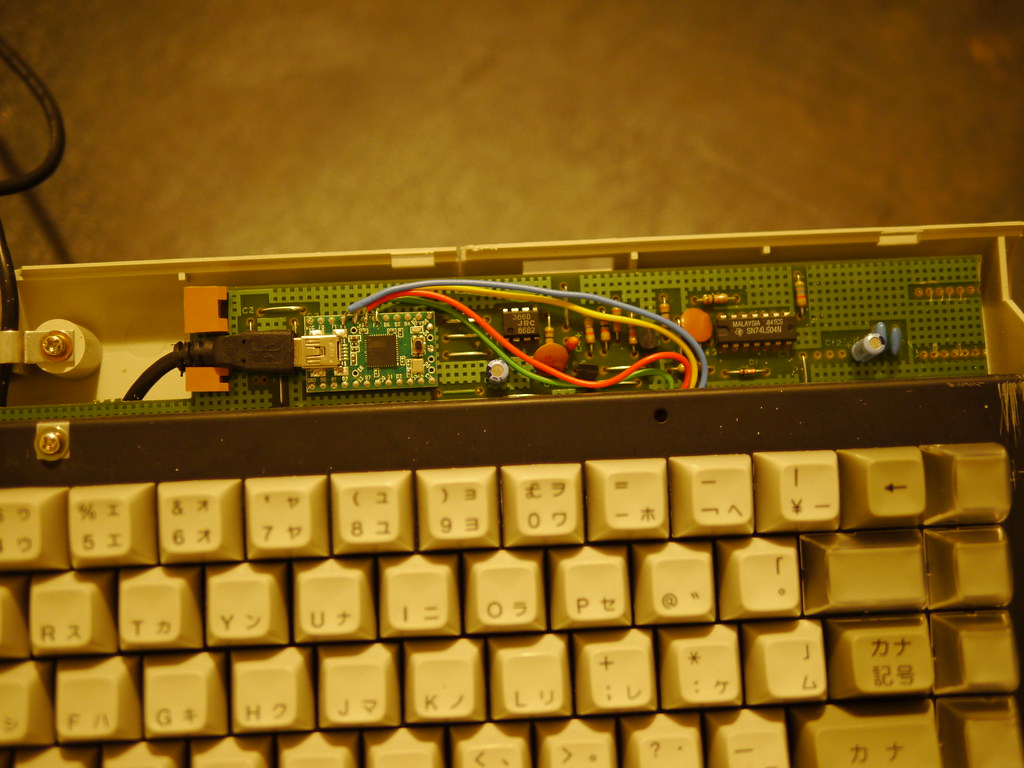
Close up on teensy wiring and USB cable. I did have to slice the USB to get it to fit in between the jacks, but I think it worked out pretty well. I considered repurposing the data jack (the upper one. Lower is for speaker) but that would involve tapping the two USB data pins from the teensy and would be a lot more work.
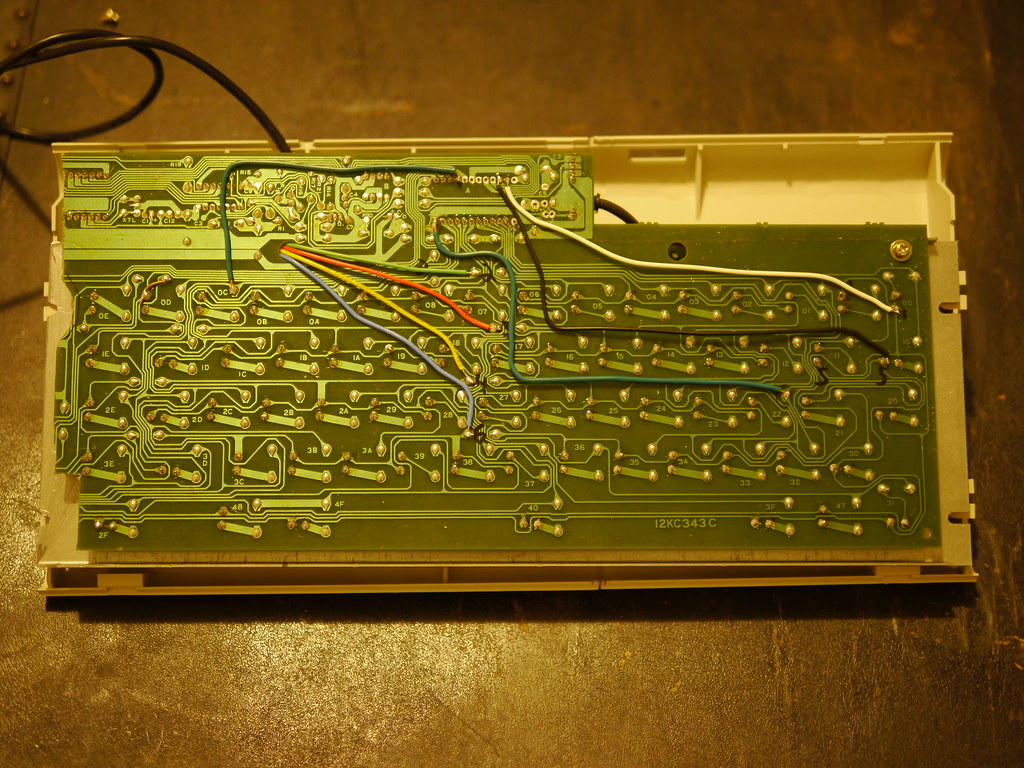
Underside of the keyboard. All rows are labelled. The green wire on the left "moves" that column to a different teensy pin somewhere on the top. I think that was the LED pin or something because I was having issues with that column so I moved it. The jumper on switch 0D adds 0E to that column, so I wouldn't need another wire there.
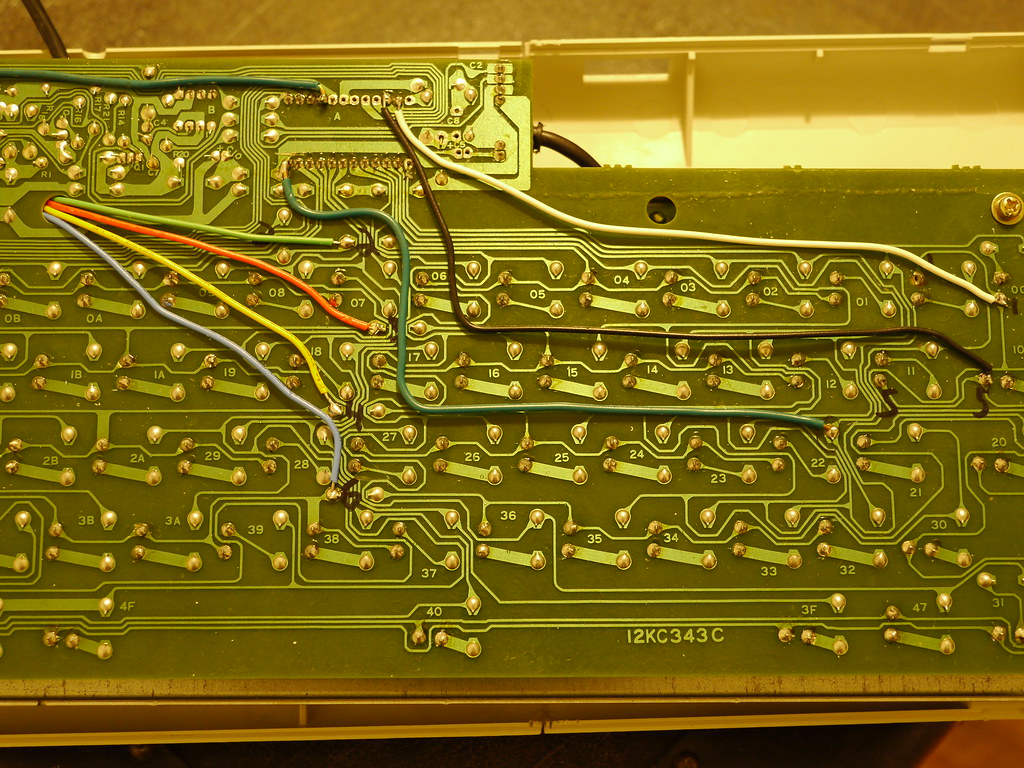
The green wire on the left is to "move" the first column there. On the teensy that pin is for VCC which I couldn't feed into my KB, so I sliced it (if you zoom in you can see an X I put there to mark it) Then I sliced the trace for the lower left pin, which is power for the mux chip that used to be there driving the columns, the wire "moves" column 1 to that pin, solving 2 problems with one wire.
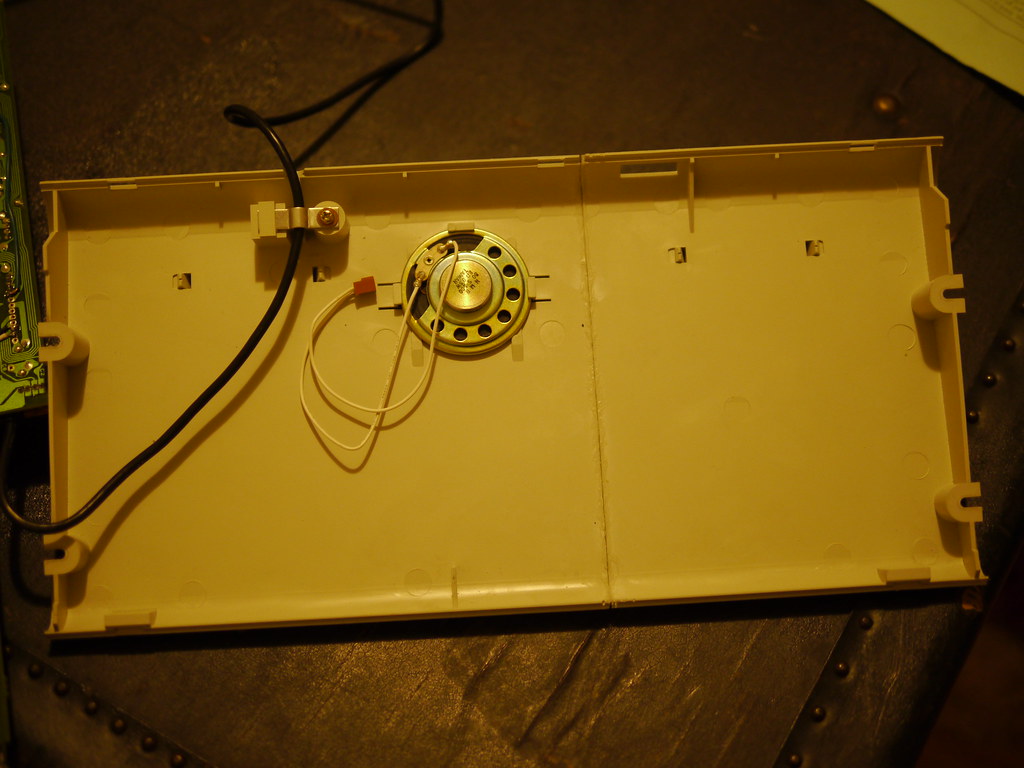
On the bottom we see the speaker in place and the lower seam. in the middle of the lower edge, I had to remove a clip that interfered with something. You can see two upper edge clips on the left that do still mate, but the right one does not due to asymmetric cutting. On the lower, the left clip matches and the right does not: same reason. The large hole on the middle right is for the volume knob on the KB that no longer exists.
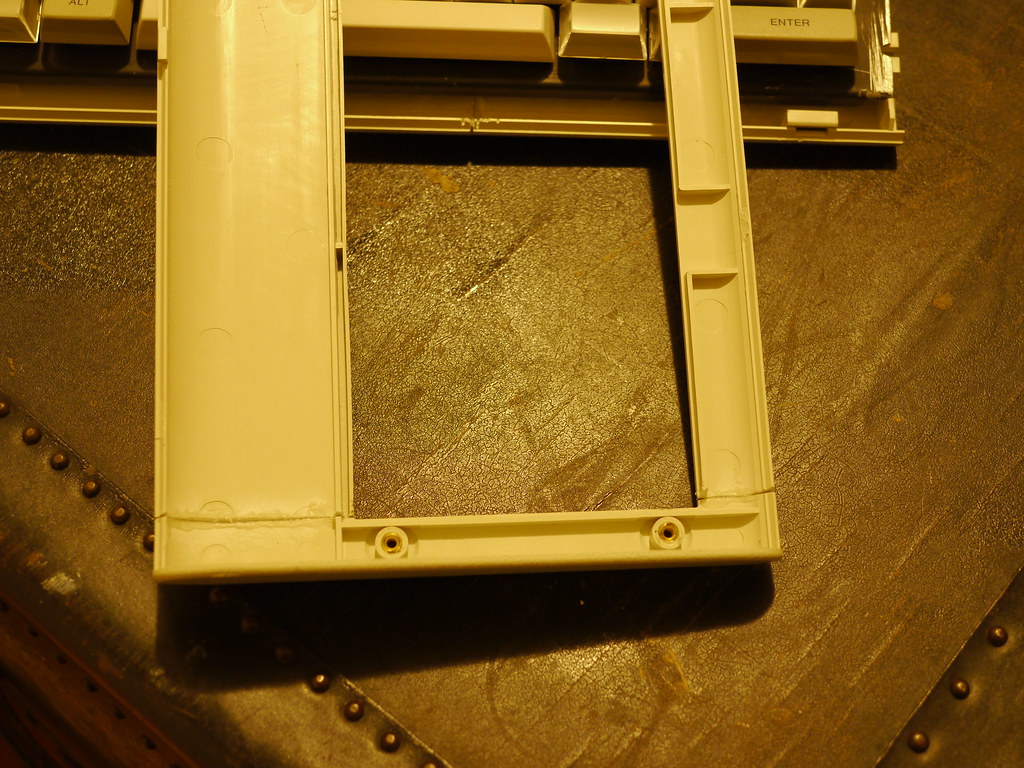
Here is the "seam" on the inside of the top. Again it is asymmetric: the top "cut" is at the end of the KB shelf, and the bottom one is moved a few mm inward from there for better strength. Its hard to see, but I had to cut a case locking "tab" off. it used to exist on the far right edge, where that little box is. It mounts to the hole near the key marked "enter" on the keyboard behind. I also had to slice another tab on the top left edge, which is near the alt key.
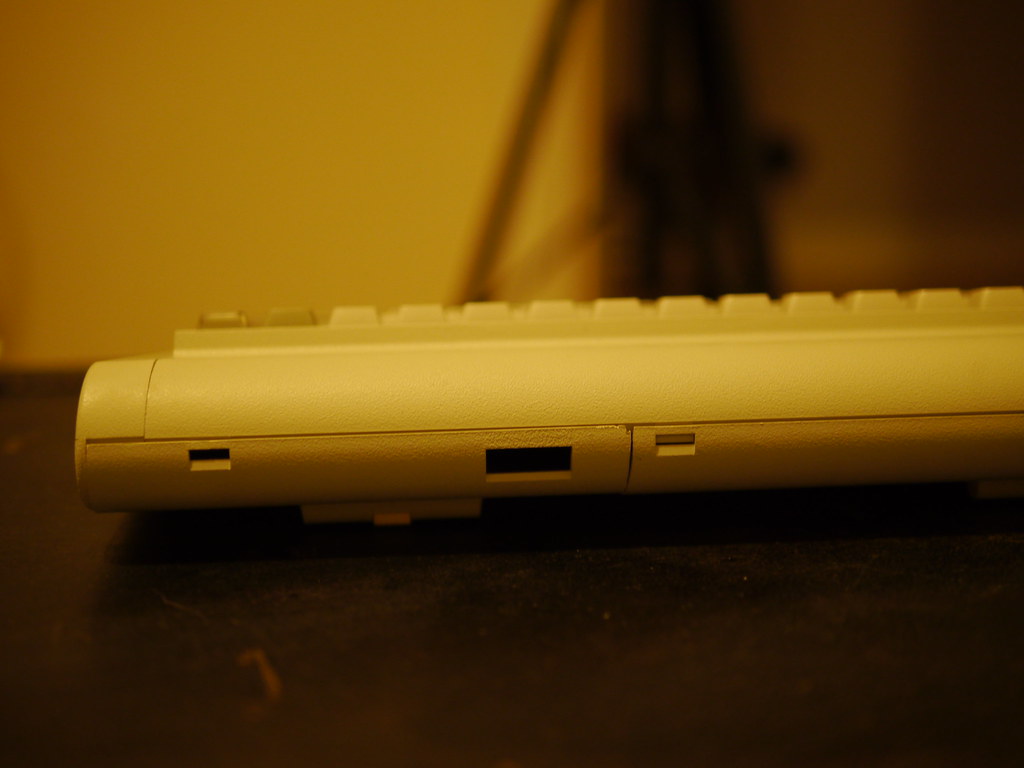
you can see what locking pieces no longer exist in this shot as well as how closely I was able to align everything. I actually cut and filed it flush by hand (over the course of several months, probably at least 10 hours of effort) then filed it inward to make a "v" shape for the glue to fill. I plan to add more later, but it's holding just fine now.
OK that's all for now. I'll put up some decent shots once I have light again.