Worked all day on these. This is my wiring solution, such as it is. I noticed DMW used a much more logical method, but not 100% sure it would work in my case since I'm using cherry's + alps and he just used alps, so there isn't quite as much room. It's pretty cluttered and high tolerance. Not sure how much luck I'd have at making some kind of pattern like this by hand. I think I may have to research photo-etching to do this.
This was the best I could come up with for the traces.
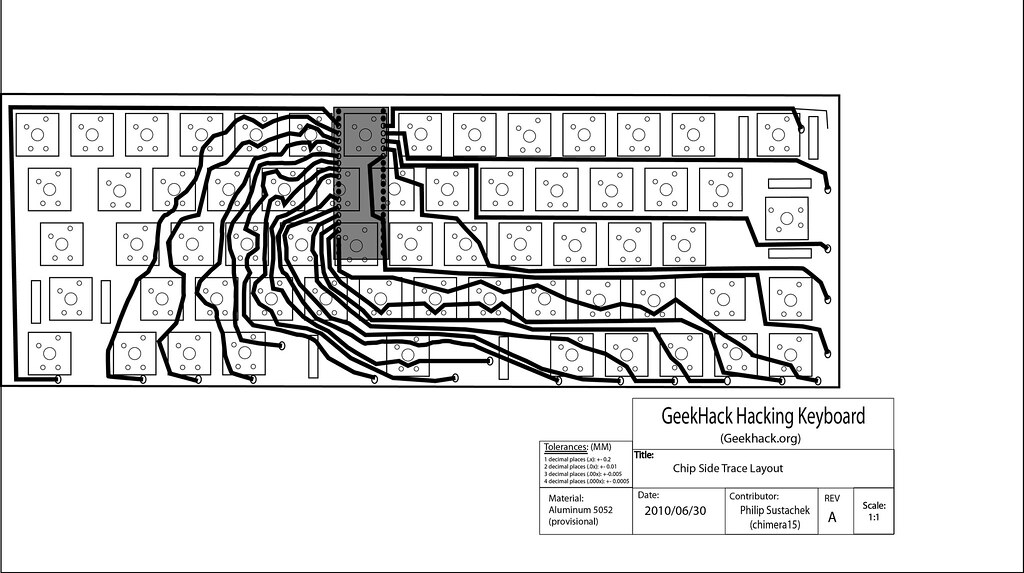
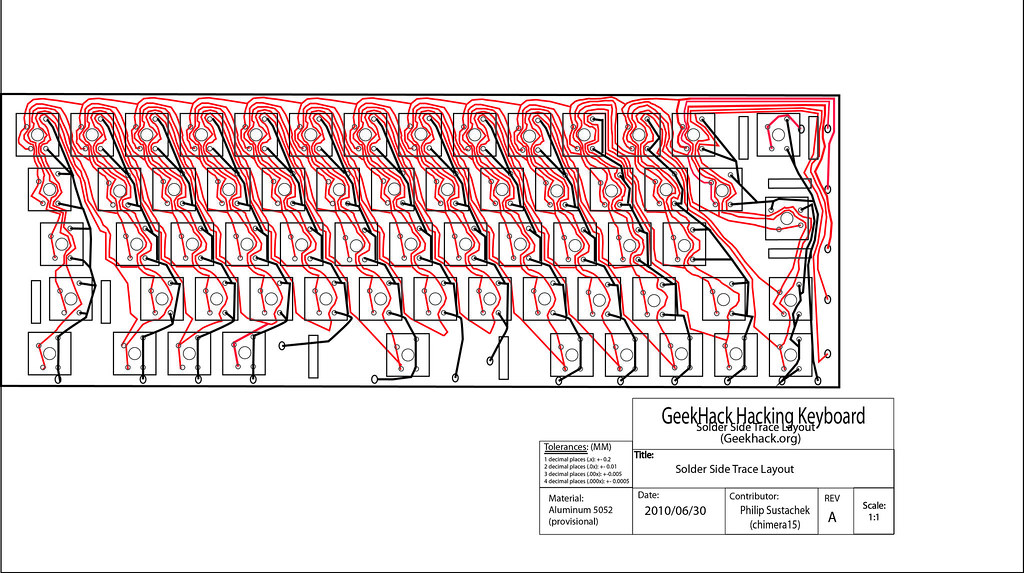
The major concern I have is that some traces are going to be running an extremely long distance with this configuration. I'm wondering if the resistance will be too high at the end of the run to recognize the activation of the switch...
The second of course is that the traces may come into contact with the solder points as I have to have them running close to the holes/contacts and under the switches.
This was like doing a puzzle on steroids. Or maybe a maze. lol, and this was simple as far as matrix goes. I don't know how they ever figure it out for a normal chip.
Last step in illustrator is to do a cap layout which I need for Signature Plastics. So far they've been pretty good. An order of 5 sets of caps is pretty realistic, but they need to know the exact measurements of the odd shaped keys.
I realize I need to offset one of the alps pin holes still. Alps will be mounted upside down. I also need to do a plate alternative for them. For now I'm going to concentrate on making a cherry board though.


