I realize that this thread has a ton of photos in it already, but I will show no mercy. I will continue to fill this thread with pictures, mobile users and capped bandwidth users be damned

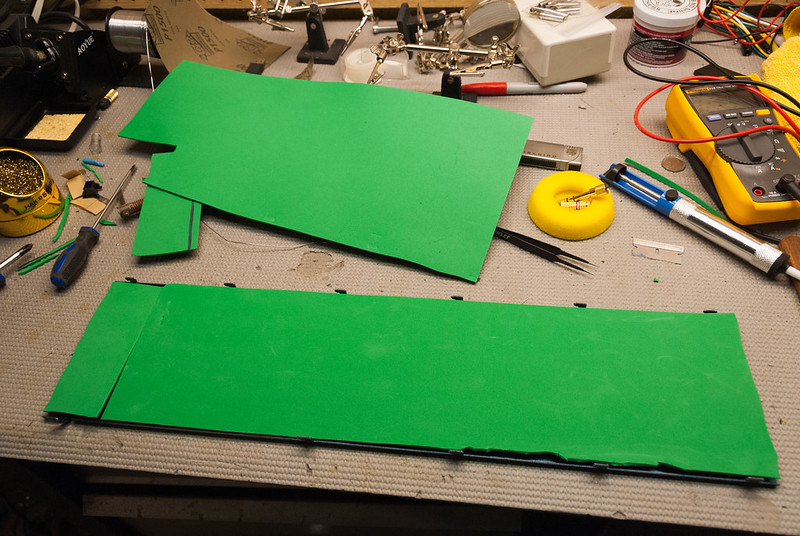
I made great progress the past couple days. I managed to quite easily tackle the replacement foam issue. Based on reading a bunch of threads, I chose what was not only recommended, but would be the cheapest and easiest to obtain. That would be .49 cent sheets of craft foam from the local craft store. I picked up $7 worth, and only used 2 sheets. Overkill at its finest.
I want to start by saying that I did everything manually, with scissors. I have the proper tools somewhere buried in the mess of my workshop, but due to impatience, I did just about this entire process using scissors and a razor blade.
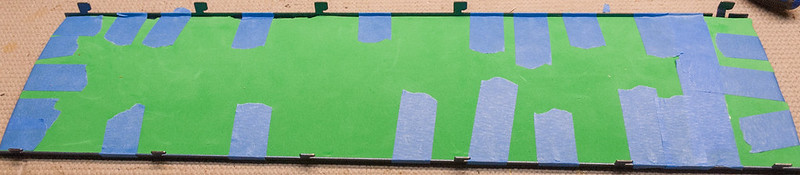
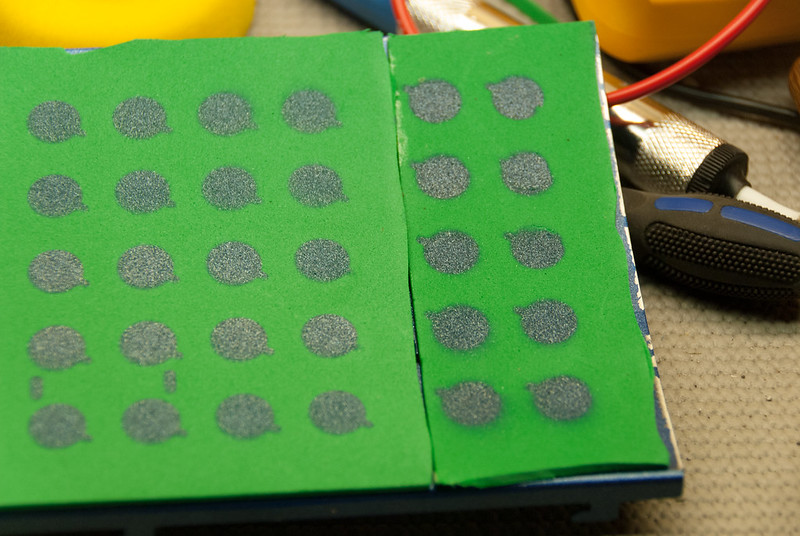
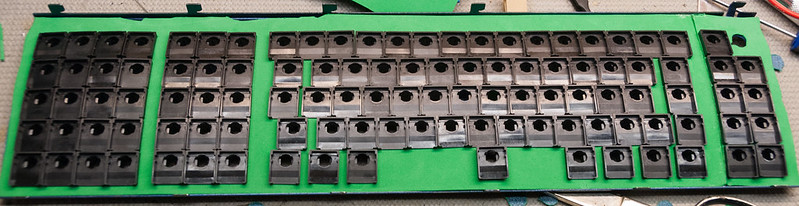
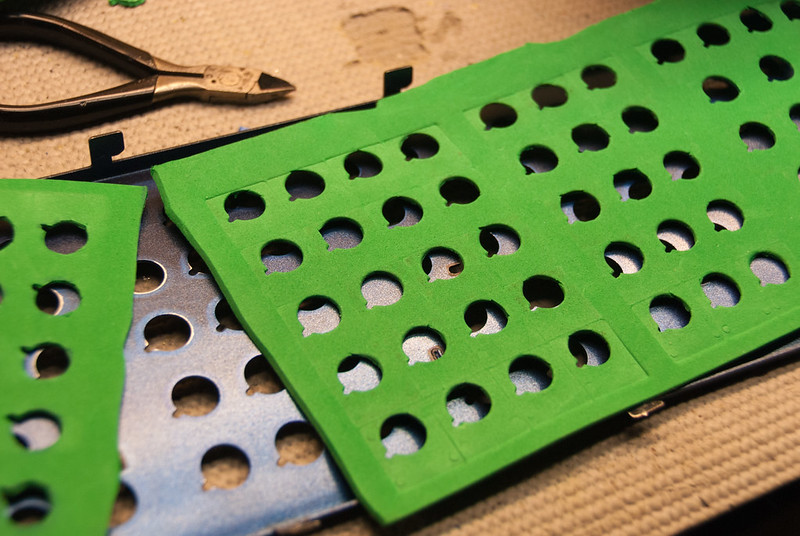
Cutting the foam horizontally was the first step. Getting it to fit into the edges of the barrel plate, was easy. The first thing that I noticed was that being such a huge ass keyboard, the foam that I bought would not reach the last (technically first if looking at it right side up) column of 10 barrels. So I had to cut out a separate block. I taped the felt down to the plate with what I thought would be safe, blue tape. Then I did a coat or 2 of paint onto the plate, leaving wonderful outlines on the foam.
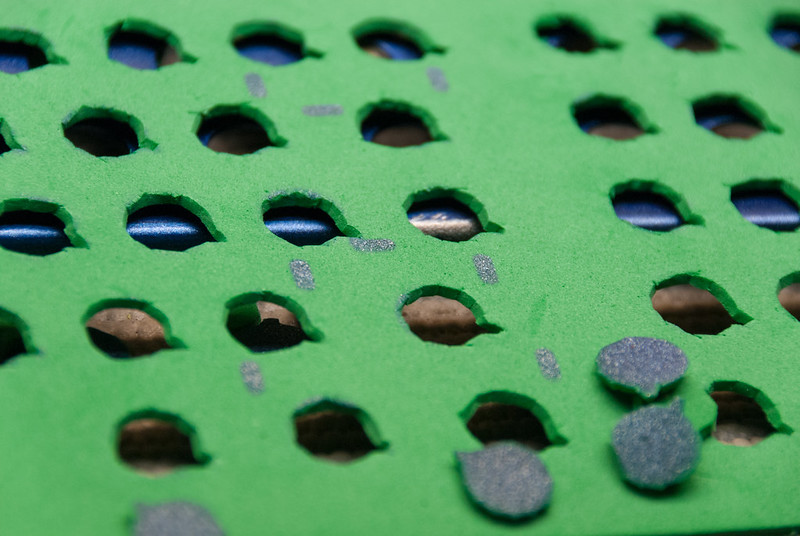
I proceeded to cut out each individual circle. At this point, I was planning on using my drill press to cut out each individual circle. I tried on the first hole, and it tore up the edges of the foam pretty bad, and it also meant I would need to cut out the small notch manually, anyway. The only x-acto knife I had was super dull, so that meant, and like I mentioned, my leather punches were buried, and I had no desire to go dig for them. In the end it took me about an hour exactly to cut out all of those holes. While they don't look pretty, they hold the barrels perfectly, and I didn't manage to screw any of them up.
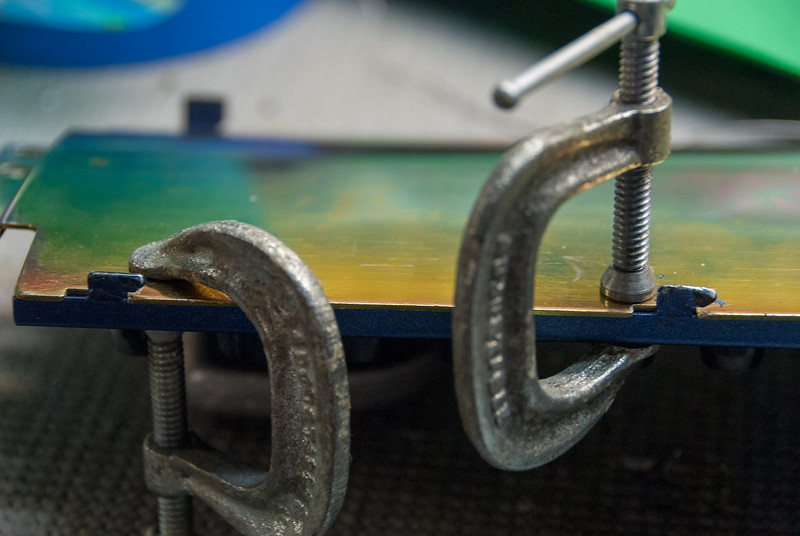
This part was the most tricky to figure out. I still don't know whether I did this appropriately, but I do know that it works. After installing all the stabilizers in backwards (minus the spacebar) and popping in all of the flippies (including some in the wrong barrels), I needed to find a way to get the PCB onto the plate. The same thread that was fohat mentioned using craft foam, there was also discussion about using clamps for something. To be honest I did not read that entire thread, as carefully as I should. When I got to this step, I knew exactly what they were talking about with the clamps. These are the steps I used to very easily get the plates back together. I don't have any more pictures of this process sadly:
1. Lined up the PCB and the barrel plate, and hooked in the side of the barrel plate/PCB with the longer fatter metal tabs.
2. On the side with the smaller thinner metal tabs, I took a pair of needle nose pliers and bent them back from the plate.
3. Using clamps I tightened the PCB and plate together, until the PCB passed the edge of the tab.
4. Then I bend the tab back into place over the PCB using pliers, and do that for all the tabs.

As you can see, the plate looks like crap. The paint got torn up for a couple reasons. The primary being the fact that I did not really give the plate time to cure. This probably only had 6 hours at most to cure from the last coat, to trying to assemble everything. The clamps, the blue tape, and a screw driver (inserting stabs) all proved to destroy the paint. For this reason, I highly recommend allowing any paint 3 days to fully cure (yes 3 whole days), as well as using heat shrink (or duct tape etc.) on the edges of the clamps. This should help to reduce the destruction of your beautiful paint.
I was impatient with assembly because I was already pretty sure I wanted to repaint the plate with a more drab color, and I wanted to test to see if that foam worked at all, or if I needed to get to work on something totally different.
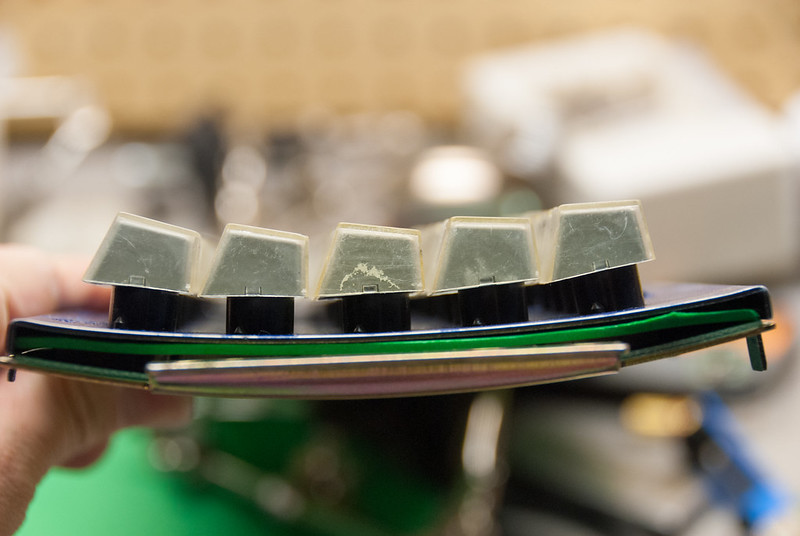
After assembling all of the keycaps, I noticed that the top and bottom row keys felt insanely sturdy and were surprisingly not all that pingy. The center 3 rows on the other hand felt very "light", they pinged like a piano, and if you wiggled around the "F" key, R, D, G, C, V, R, and T all moved around with it. I also found out that I put a few flippers in the wrong spots for the stabilized keys, and some how I have managed to lose a single barrel+flipper, with no freaking idea where it went!

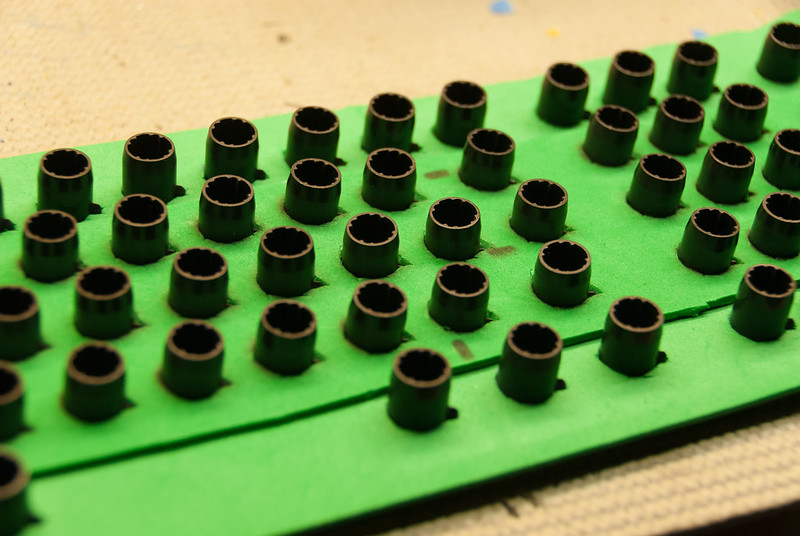
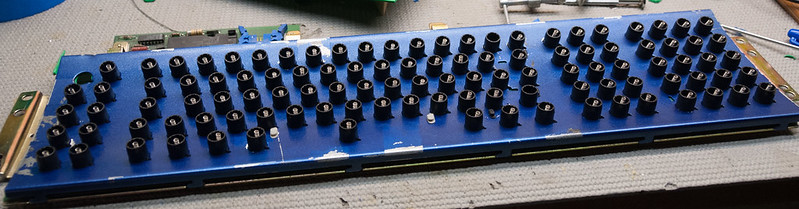
Opening everything back up, I found exactly what I suspected. There was not enough foam on the middle rows. You can see by the marks left in the top and bottom row, with hardly anything on the middle 3 rows! I have remedied this by cutting out a second piece of foam for the middle 3 rows.

I have also decided to repaint the plate with a nice Walnut color. I am also clear coating the plate, and it is currently drying in a nice spot, and will be curing for 3 days. I will not be reassembling everything until Monday.
I will close this project update with a question. I want to update my key layout on this board. Specifically I would like to lengthen the left shift, possibly do a HHKB style right shift, and extend the enter key. I would also like to replace all of the windowed keys. I want nav keys in the first block of 15, and then turn the block of 20 into a numpad, with something like F1-10 in the block to the far left.
What would be the best way to do that? I was originally thinking about just buying a Unicomp keyset for $30, but there is that whole quality issue there. Would it make sense to just buy and strip a Model M, or does Unicomp have decent enough quality? And what about the special size keys. To do the layout changes I am considering, are there any specific keys, not included in a stock layout that I would have to separately source?
And finally, thanks Fohat.digs, again for the spacebar info. I got that info backwards. Luckily my spacebar is in spectacular condition, so I won't be needing that replaced.


