Author Topic: Blender: from scratch to first keyboard render  (Read 2965 times)

0 Members and 1 Guest are viewing this topic.

Offline cest73

  • Thread Starter
  • Posts: 173
  • Location: serbia
Blender: from scratch to first keyboard render
« on: Mon, 05 July 2021, 05:36:27 »
So, i see a lot of people considering this free alternative and coming somewhat unprepared to the hobby...


I plan here to make a short tutorial:

1. fire up blender and set up some of the shipped plugins
2. set up a quick and simple scene
3. get a keyboard exported from KiCAD
4. equip it with some switches
5. equip them with some keycaps
6. set up cycles and render a screenshot


Once in the training, the process should take less than two hours end to end.


Offline blondie

  • Posts: 47
Re: Blender: from scratch to first keyboard render
« Reply #1 on: Mon, 12 July 2021, 12:53:23 »
I thought KiCad was just PCB design. I don't know how you get a 3d case design that can be rendered in Blender with that.

I've been using FreeCAD, but exporting to a format Blender can use has been difficult. I can export to the .obj format, but the result isn't perfect, and it doesn't provide sufficiently smooth corners.

Offline cest73

  • Thread Starter
  • Posts: 173
  • Location: serbia
Re: Blender: from scratch to first keyboard render
« Reply #2 on: Tue, 13 July 2021, 16:25:40 »
1. Blender plugins:

a. Get Blender, install it and run it.
b. In the Edit/Preferences window select the Plugins card[1]
c. Set the filter to Material [2]
d. Select Material Library [3]
272311-0


Likewise in Import/Export filtered list select:


a. OBJ (advantages on import)
b. VRML2 (it has more words there so read carefully  :D ) (can make WRL files)


Make sure to save the preferences.


Now on You will be able to assign one of the shipped Node materials to any material slot of any object in blender.


I thought KiCad was just PCB design. I don't know how you get a 3d case design that can be rendered in Blender with that.
Once you get used to exporting into various formats it quite straight forward to get just about anything into or out of KiCAD or Blender

Quote
I've been using FreeCAD, but exporting to a format Blender can use has been difficult. I can export to the .obj format, but the result isn't perfect, and it doesn't provide sufficiently smooth corners.


We'll see to get you comfortable thru that in due time  ;)


272313-1
Example of KiCAD render output

Offline cest73

  • Thread Starter
  • Posts: 173
  • Location: serbia
Re: Blender: from scratch to first keyboard render
« Reply #3 on: Sun, 18 July 2021, 07:18:36 »
2. Set up a simple scene

a. Run blender and it will greet you with the default cube, camera and a light

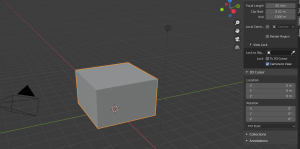
First make the cube some 4x4 meter across and some 2.5 m high, that will be the room (good renders use the light bouncing off the surrounding

(i press [tab] to enter edit mode, [g], [z], [1], [enter] to move it up a meter, [s|, [shift]+[z], [2], [enter] to make it 4 x 4 across, select the top side and [m], [z], [.5] [enter])
272515-0
Now on we make it have some different materials next:

Press [NP_0] to switch to camera view and press [n] to bring up numeric data to the view port - select view tab and enable Lock... camera to view.
Now on when in camera view when you navigate the view it stays as the actual camera position

Next switch off to normal view and get the camera and the light inside the box

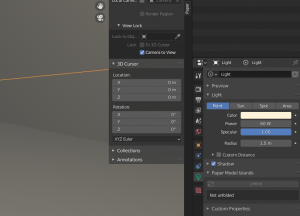
Set the light to some sane levels:
272517-1
the hue and saturation are at some 0.11 - 0.15 value
Now we need an actual set light next:
Make a plane, size it to some 1 meter across, [i|, inset it for some 1 m then drag that middle square [g], [z], .1 [enter] to make a cut off pyramid - that's the light source to be. Select all and extrude some 0.005 meter so we can have single sided materials but two different faces.

Now it won't show much until you render it but let's make first some materials next:
Select the cube and make a new material slot on the material tab, make two more too.

1. Wall material is perfectly fine as a basic diffuse material - just taint it with every so little color to not be just plain boring white (or not  :p )

Select the light source, make two materials for it:
2. The Back of the light can be same just some back gray
3. One more material make it be emission and give it strength about 2 (we play with it later on)

This is the perfect place to save the scene now.

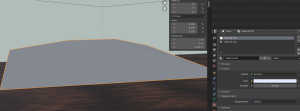
Bring the light in the edit mode and select the inner emmisive surfaces, select one of the materials and press assign, in the view port press [ctrl]+[i| so the opposite gaces are selected, assign them the other material
272519-2
Do the same to the cube so it has a separate ceiling, floor and walls material wise.

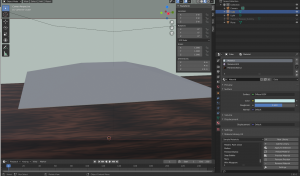
For the floor find the Material Library VX tab down the material view port and select Sample Materials. scroll the list and find Polished Walnut, assign it to the floor.

Now we have a scene about ready to receive a keyboard

Some among us will consider get some furniture inside, but this is out of my scope for now.
272521-3
Upon selecting Cycles as the rendering engine and pressing [F12] i was presented (after a while) with the following:
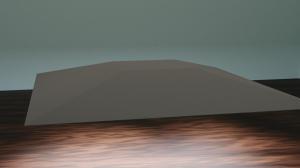
272523-4
To save time you can make the output a fraction of the full size (25% comes to mind) until you are sure it is worth the wait

« Last Edit: Sun, 18 July 2021, 07:22:16 by cest73 »