Author Topic: "Heavy 75" - build log of my first custom kb  (Read 2453 times)

0 Members and 1 Guest are viewing this topic.

Offline mattg

  • Thread Starter
  • Posts: 3
  • Location: Germany
"Heavy 75" - build log of my first custom kb
« on: Mon, 12 October 2020, 00:33:19 »
Hi all,

long time reader here but just registered recently. Thanks to the great amount of info here, I'm about to start my first custom build. It will be a 75% based on the KBD75 v2 pcb.

I already have the pcb, cherry screw-in stabs, MX clear switches and the upper part of the case in front of me, so i expect to start building at the end of the week when I find the time.

I want the keyboard to be as solid and stiff as I can make it, so the case consists of three milled aluminum parts. The top and bottom plate are 4mm thick, with local pockets in the top plate milled to 1.5mm thickness where the stabs are sitting. Both are spaced 6mm apart by a frame which itself was milled out of an 8mm thick sheet.
All in all, this makes for a total height of 14mm. You can see how the parts fit together in the section view.

The empty case weighs around 730g/1.6lbs.

I didn't get around to do some actual photos of the parts but will do so when I start building. I have attached a render straight out of NX (didn't want to export the stuff to Blender), a section view and the planned layout.
Cheers,
Matthias

Offline mattg

  • Thread Starter
  • Posts: 3
  • Location: Germany
Re: "Heavy 75" - build log of my first custom kb
« Reply #1 on: Fri, 16 October 2020, 13:28:47 »
So today I did the first assembly steps and can finally share some actual pictures.

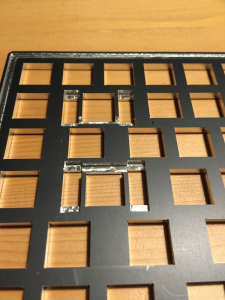
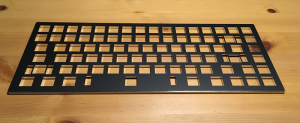
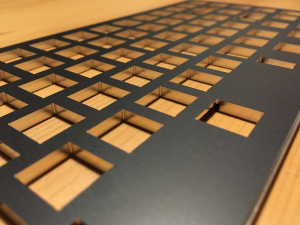
Here are some photos of the front plate, also showing the pockets which were milled to allow for clearance around the stabs and stab wires
253652-0

253654-1

253658-2

Because of the plate's thickness the switches are only held in place by friction (apart from being soldered to the PCB, of course), but when dry-fitting some switches for a test it showed that they sit in there quite securely, yet are easy enough to pull out without needing tools, in case I ever want or need to replace them.

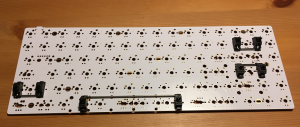
The first action was mounting the stabs to the PCB. I used GMK screw-in type stabs which came with nylon washers. It's not that you absolutely need the washers (at least for the layout I am going to use), but I used them anyways, just to be on the safe side.
I didn't do any clipping, lubing, band-aiding etc., so just mounted them factory-default.
253656-3

Next up is soldering...
« Last Edit: Fri, 16 October 2020, 13:52:22 by mattg »
Cheers,
Matthias

Offline mattg

  • Thread Starter
  • Posts: 3
  • Location: Germany
Re: "Heavy 75" - build log of my first custom kb
« Reply #2 on: Fri, 23 October 2020, 14:42:06 »
Today I mounted all the switches and soldered it all together. Now I'll have to wait for the frame and bottom plate to arrive.

Cheers,
Matthias