Author Topic: Kishsaver Rehabilitation - Pics  (Read 4092 times)

0 Members and 1 Guest are viewing this topic.

Offline ghostjuggernaut

  • * Curator
  • Thread Starter
  • Posts: 3575
Kishsaver Rehabilitation - Pics
« on: Sun, 11 February 2018, 19:21:02 »
As some of you know, I recently came into the posession of an all original Kishsaver.  I am going to go ahead and use this thread to document my restoration of it and anything that happens along the way.

Here are some initial pics I took of it:


All things considered, its in pretty good condition.  About half of the keycaps have scratches on them, i assume from the initial shipping  :)).  For now I have ordered a set of blanks from Unicomp and will use those until I decide if I want to search for new printed caps.  Hoping to stay away from Unicomp printed if possible, and honestly I prefer blanks.

I purchased an ultrasonic cleaner the other day and tested it on the D key to start.  Work pretty well with just 2 8 minute cycles.


Following the test i went ahead and removed all the keys to assess the plate condition and was greeted with this beauty.

**Dirty pic incoming**
More


That is about all i have done so far.  I have gone over the case with a washcloth just to see how deep the dirt is on it, and will probably end up soaking it like sixtylife did with his.  Overall the case is pretty clean so I dont think ill have too much trouble getting the little bits off of it.  As far as other issues, there is a slight upward bend in the front edge of the top case.  I will most likely attempt straightening by hand to the best of my ability.  The spacebar wire is missing so ill most likely end up just using a model M spacebar and wire, basically what I used with the dethkish.

Plans moving forward:

I have xwhatsit pcbs, but for some reason assumed they came from oshpark assembled... not so much.  My fault since I didnt fully read into them.  I ordered all the components needed to build them last night, with one component being backordered until april and not being able to find the 6 pin connector.  All in all im not too upset.  I still have a lot to do before im ready to install the new controller.  Once i get everything in, ill post a list of the parts needed in the event anyone decides to go this route in the future.  The components werent the easiest to locate, but are all documented.  At least I learned a lot about searching digikey and mouser :)

I have ordered new foam, just in case, and some stabilizer inserts to modify it to a happy layout.  Once the foam gets in I will start the teardown.  I plan on cerakoting the plate, but am still undecided on the color.  I sent off a quote request to a local dealer, and hopefully will have a general quote back soon.  I plan to keep the case paint as is.

Ill do my best to document as much as possible moving forward.   Luckily there is a lot of info in past model F restoration threads so I think I have a good knowledge base going in.  :thumb:


P.S.  Sorry any spelling/grammar errors.  I didnt feel like going through all this text again, and fixed major mistakes... i think.


Update 2/16/18
« Last Edit: Fri, 16 February 2018, 04:58:53 by ghostjuggernaut »

Offline rowdy

  • HHKB Hapster
  • * Erudite Elder
  • Posts: 21175
  • Location: melbourne.vic.au
  • Missed another sale.
Re: Kishsaver Rehabilitation - Pics
« Reply #1 on: Sun, 11 February 2018, 19:49:44 »
Great project!

I hope it goes quicker and smoother than mine - won't be difficult :))
"Because keyboards are accessories to PC makers, they focus on minimizing the manufacturing costs. But that’s incorrect. It’s in HHKB’s slogan, but when America’s cowboys were in the middle of a trip and their horse died, they would leave the horse there. But even if they were in the middle of a desert, they would take their saddle with them. The horse was a consumable good, but the saddle was an interface that their bodies had gotten used to. In the same vein, PCs are consumable goods, while keyboards are important interfaces." - Eiiti Wada

NEC APC-H4100E | Ducky DK9008 Shine MX blue LED red | Ducky DK9008 Shine MX blue LED green | Link 900243-08 | CM QFR MX black | KeyCool 87 white MX reds | HHKB 2 Pro | Model M 02-Mar-1993 | Model M 29-Nov-1995 | CM Trigger (broken) | CM QFS MX green | Ducky DK9087 Shine 3 TKL Yellow Edition MX black | Lexmark SSK 21-Apr-1994 | IBM SSK 13-Oct-1987 | CODE TKL MX clear | Model M 122 01-Jun-1988

Ị̸͚̯̲́ͤ̃͑̇̑ͯ̊̂͟ͅs̞͚̩͉̝̪̲͗͊ͪ̽̚̚ ̭̦͖͕̑́͌ͬͩ͟t̷̻͔̙̑͟h̹̠̼͋ͤ͋i̤̜̣̦̱̫͈͔̞ͭ͑ͥ̌̔s̬͔͎̍̈ͥͫ̐̾ͣ̔̇͘ͅ ̩̘̼͆̐̕e̞̰͓̲̺̎͐̏ͬ̓̅̾͠͝ͅv̶̰͕̱̞̥̍ͣ̄̕e͕͙͖̬̜͓͎̤̊ͭ͐͝ṇ̰͎̱̤̟̭ͫ͌̌͢͠ͅ ̳̥̦ͮ̐ͤ̎̊ͣ͡͡n̤̜̙̺̪̒͜e̶̻̦̿ͮ̂̀c̝̘̝͖̠̖͐ͨͪ̈̐͌ͩ̀e̷̥͇̋ͦs̢̡̤ͤͤͯ͜s͈̠̉̑͘a̱͕̗͖̳̥̺ͬͦͧ͆̌̑͡r̶̟̖̈͘ỷ̮̦̩͙͔ͫ̾ͬ̔ͬͮ̌?̵̘͇͔͙ͥͪ͞ͅ

Offline jdcarpe

  • * Curator
  • Posts: 8852
  • Location: Odessa, TX
  • Live long, and prosper.
Re: Kishsaver Rehabilitation - Pics
« Reply #2 on: Sun, 11 February 2018, 20:39:24 »
I have a spacebar wire for you! I forgot to tell you it was in with the new labels, etc. :)
KMAC :: LZ-GH :: WASD CODE :: WASD v2 :: GH60 :: Alps64 :: JD45 :: IBM Model M :: IBM 4704 "Pingmaster"

http://jd40.info :: http://jd45.info


in memoriam

"When I was a kid, I used to take things apart and never put them back together."

Offline ghostjuggernaut

  • * Curator
  • Thread Starter
  • Posts: 3575
Re: Kishsaver Rehabilitation - Pics
« Reply #3 on: Sun, 11 February 2018, 20:46:29 »
I have a spacebar wire for you! I forgot to tell you it was in with the new labels, etc. :)

Awesome!

Offline iamtootallforthis

  • Something a lot Funnier
  • * Global Moderator
  • Posts: 4739
  • Location: West Palm Beach, FL
  • I like green stuffs.
    • WTB/WTTF Thread
Re: Kishsaver Rehabilitation - Pics
« Reply #4 on: Sun, 11 February 2018, 22:02:44 »
Looking forward to seeing the progress

Offline SixtyLife

  • Posts: 474
  • Location: New Jersey
Re: Kishsaver Rehabilitation - Pics
« Reply #5 on: Sun, 11 February 2018, 22:21:51 »
 :thumb: :thumb: :thumb: looking forward to this!
Kishsaver, JP SSK, Displaywriter SSK, 360C, HHKB Type S, X60, Jane v2, Jane v2 CE

Offline sleepy916

  • Posts: 868
  • Location: East Bay, California
Re: Kishsaver Rehabilitation - Pics
« Reply #6 on: Sun, 11 February 2018, 22:38:33 »
I'm glad you got a model f wire because the model m wire would not work.

Offline ghostjuggernaut

  • * Curator
  • Thread Starter
  • Posts: 3575
Re: Kishsaver Rehabilitation - Pics
« Reply #7 on: Thu, 15 February 2018, 02:31:09 »
Everything but the shift registers arrived yesterday.  Ill compile a list of the parts needed in the next couple days.  I'll also start the teardown tomorrow hopefully, pics to come. :)

Offline subcat

  • Posts: 195
Re: Kishsaver Rehabilitation - Pics
« Reply #8 on: Thu, 15 February 2018, 02:49:21 »
Best of luck with the restoration, I'm more than a little jealous. I'm really glad to hear that you're keeping the paint original, that is the way to go  :D

Offline pr0ximity

  • Posts: 2705
  • Location: Maine
Re: Kishsaver Rehabilitation - Pics
« Reply #9 on: Thu, 15 February 2018, 05:26:34 »
Super jealous! Will be following along, 4704 restiration is a lot if fun :)
| Flickr | KMAC 1.2 | Koala | GSKT-00-Z | GSKT-00-AEK | GON NerD60 | Jane V2 CE | Whale | J80S | Ibis | Pro2 | Pro1 | 356mini | 356CL DGE | G80-5000 HAMDE | IBM 1390120 | IBM F AT | IBM F122 | IBM 3101 | Zenith Z-150

Offline joey

  • Posts: 2296
  • Location: UK
Re: Kishsaver Rehabilitation - Pics
« Reply #10 on: Thu, 15 February 2018, 05:32:51 »
YES! It's happening!

Offline audax989

  • Posts: 961
  • Location: Guam
  • NOM NOM NOM
    • Guam Mechanical Keyboards
Re: Kishsaver Rehabilitation - Pics
« Reply #11 on: Thu, 15 February 2018, 06:37:18 »
the master of kish. can't wait to see what comes out of this.

Offline Signature

  • master of puppers
  • * Marketplace Moderator
  • Posts: 1914
  • Location: Sweden
  • snoozing
Re: Kishsaver Rehabilitation - Pics
« Reply #12 on: Thu, 15 February 2018, 06:41:24 »
I like this thread  :)
Very busy with studies atm.

Offline _haru

  • Formerly linuxfanatic
  • Posts: 390
  • Location: Perth, Western Australia
  • Back from the dead
Re: Kishsaver Rehabilitation - Pics
« Reply #13 on: Thu, 15 February 2018, 06:43:19 »
Very nice.

Make the plate pink. I dare you.
AMJ60 - 45g MX White | GH60 Rev. C - Ghost Gateron Blacks | DFK101 - Alps SKCM Cream | Filco Majestouch 2 TKL - 62g Vintage MX Ergo Clear

Offline Kavik

  • Posts: 819
Re: Kishsaver Rehabilitation - Pics
« Reply #14 on: Thu, 15 February 2018, 13:19:17 »
Interesting. I'll be following this thread.
Maybe they're waiting for gasmasks and latex to get sexy again.

The world has become a weird place.

Offline ghostjuggernaut

  • * Curator
  • Thread Starter
  • Posts: 3575
Re: Kishsaver Rehabilitation - Pics
« Reply #15 on: Fri, 16 February 2018, 04:58:10 »
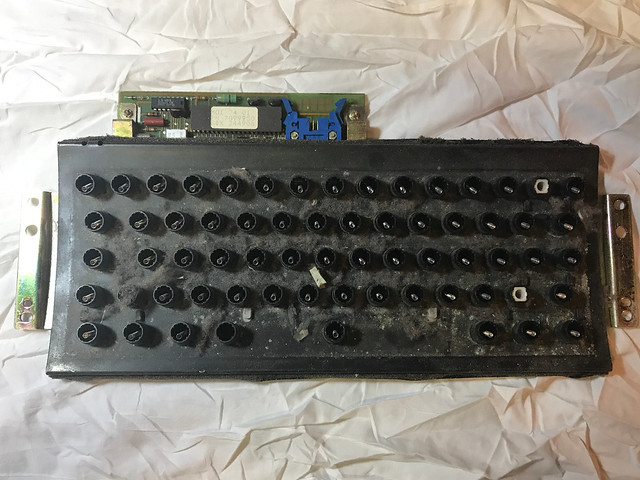
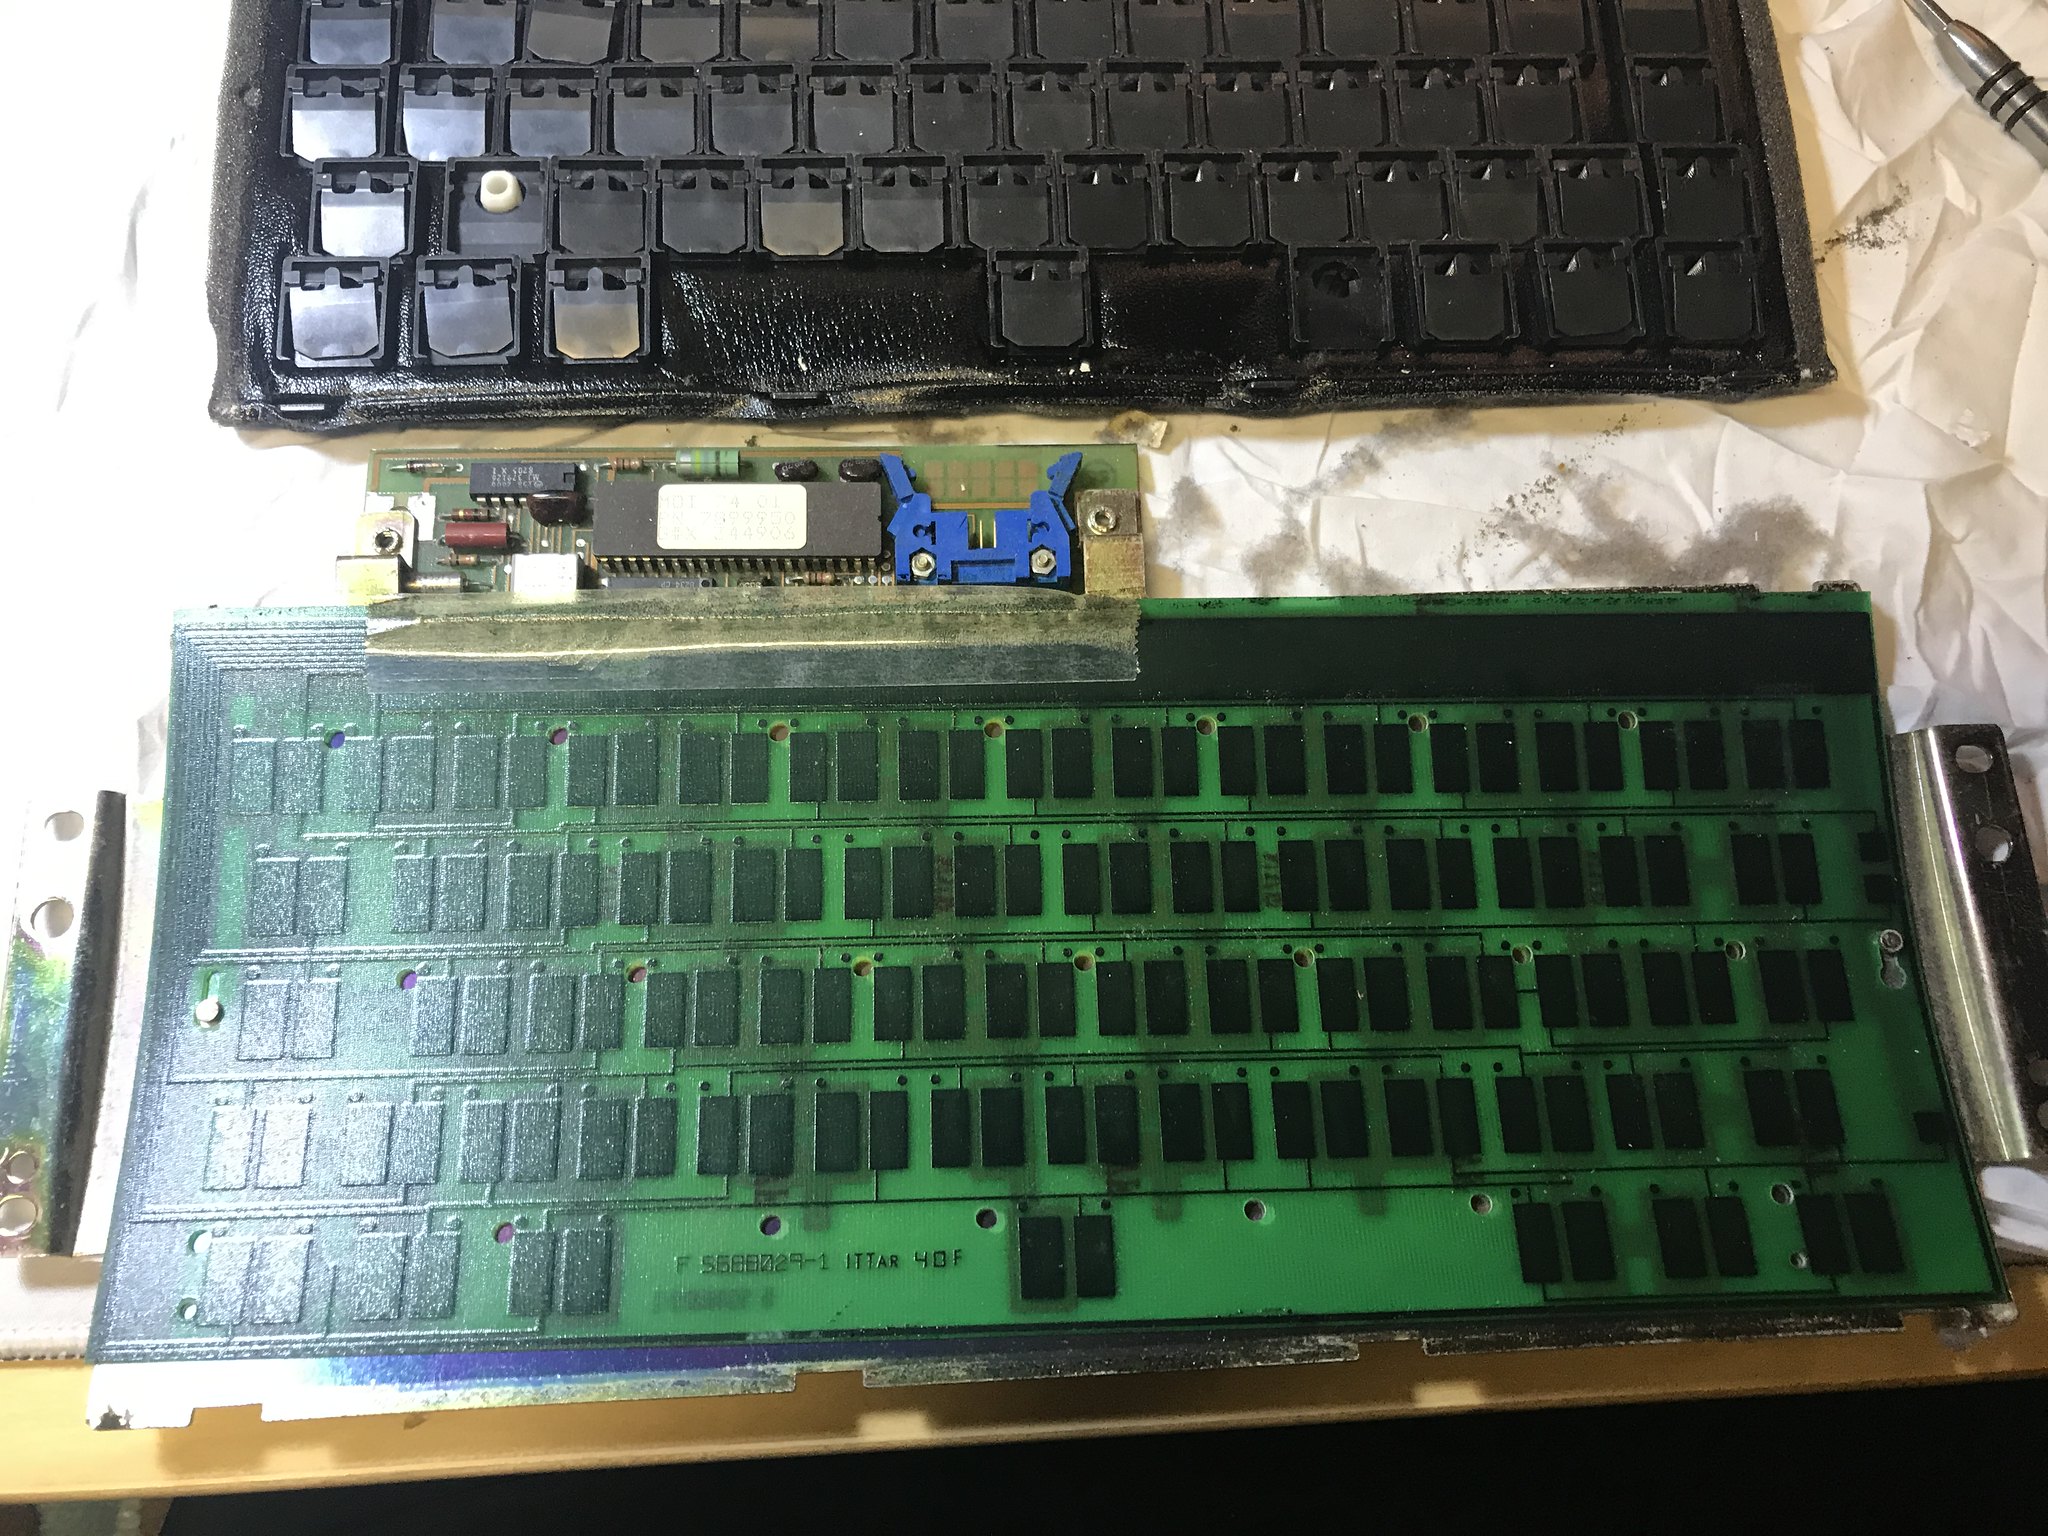
Last week I went ahead and took the PCB assembly out of the case.


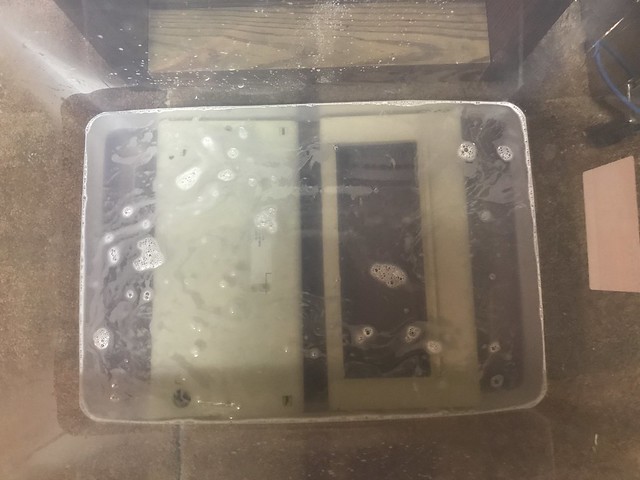
Before I started work getting things apart, I went ahead and filled up a tote with hot water and laundry detergent, based on sixty's restore.  All in they sat for 6 hrs and I just took the case out.  There wasn't a whole lot of stubborn dirt, and I just used a rag to wipe it down.  I don't have a post picture of it, since its air drying right now.  I'm happy with how it turned out though.


Luckily, one of the spacers for the plate/case was in great condition.  The other one not so much.  IIRC someone had made a 3d file for these, and I will probably end up going that route.  I don't recall if anyone else had come up with a better solution over the years, and if so due let me know.  I have a few weeks before things will be ready to reassemble, so I'm not in a huge rush to get it sorted.


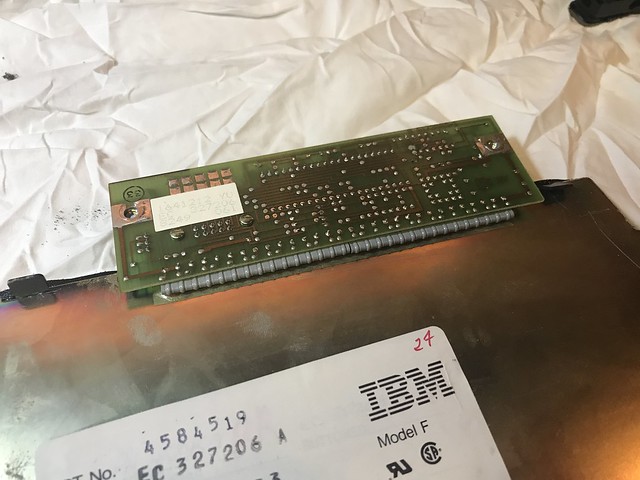
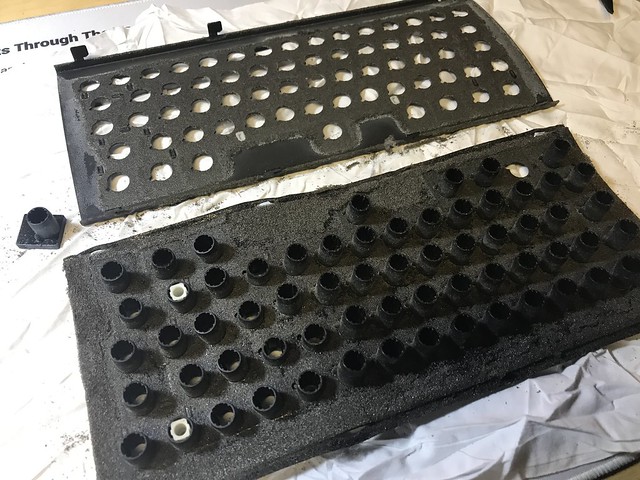
I didn't expect there to be such a mess when dealing with the foam, and am glad I put down a rag first.  Next I went ahead and removed the two screws that were holding the controller on.  I wasn't sure how things were going to come apart, and figured it wouldn't hurt to get this out of the way.  Turns out it was for nothing, but will save me all of 2 minutes when I desolder it.


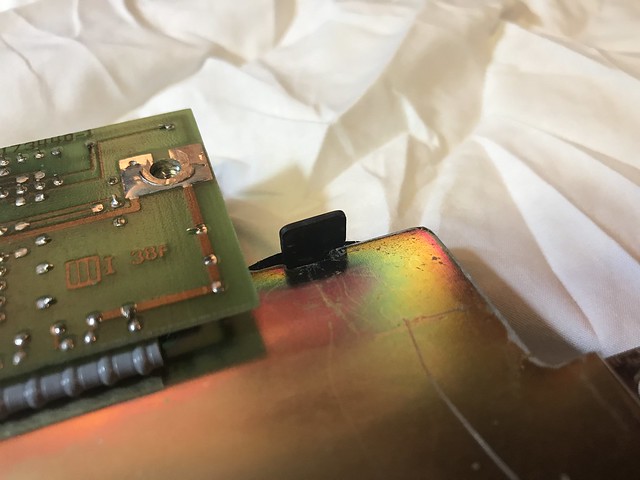
This is the tab that you need to flip up.  You can see it in the above pic while its down.  I just used a pair of needle nose pliers to gently bend it up to unlock the plate from back plate.


I probably took 20 minutes separating the two halves.  I wasn't sure how much pressure was the right amount to use, and didnt want to run the risk of damaging any of the barrels.  Ultimately I was able to figure out the right amount of pressure to use and get the two plates split.


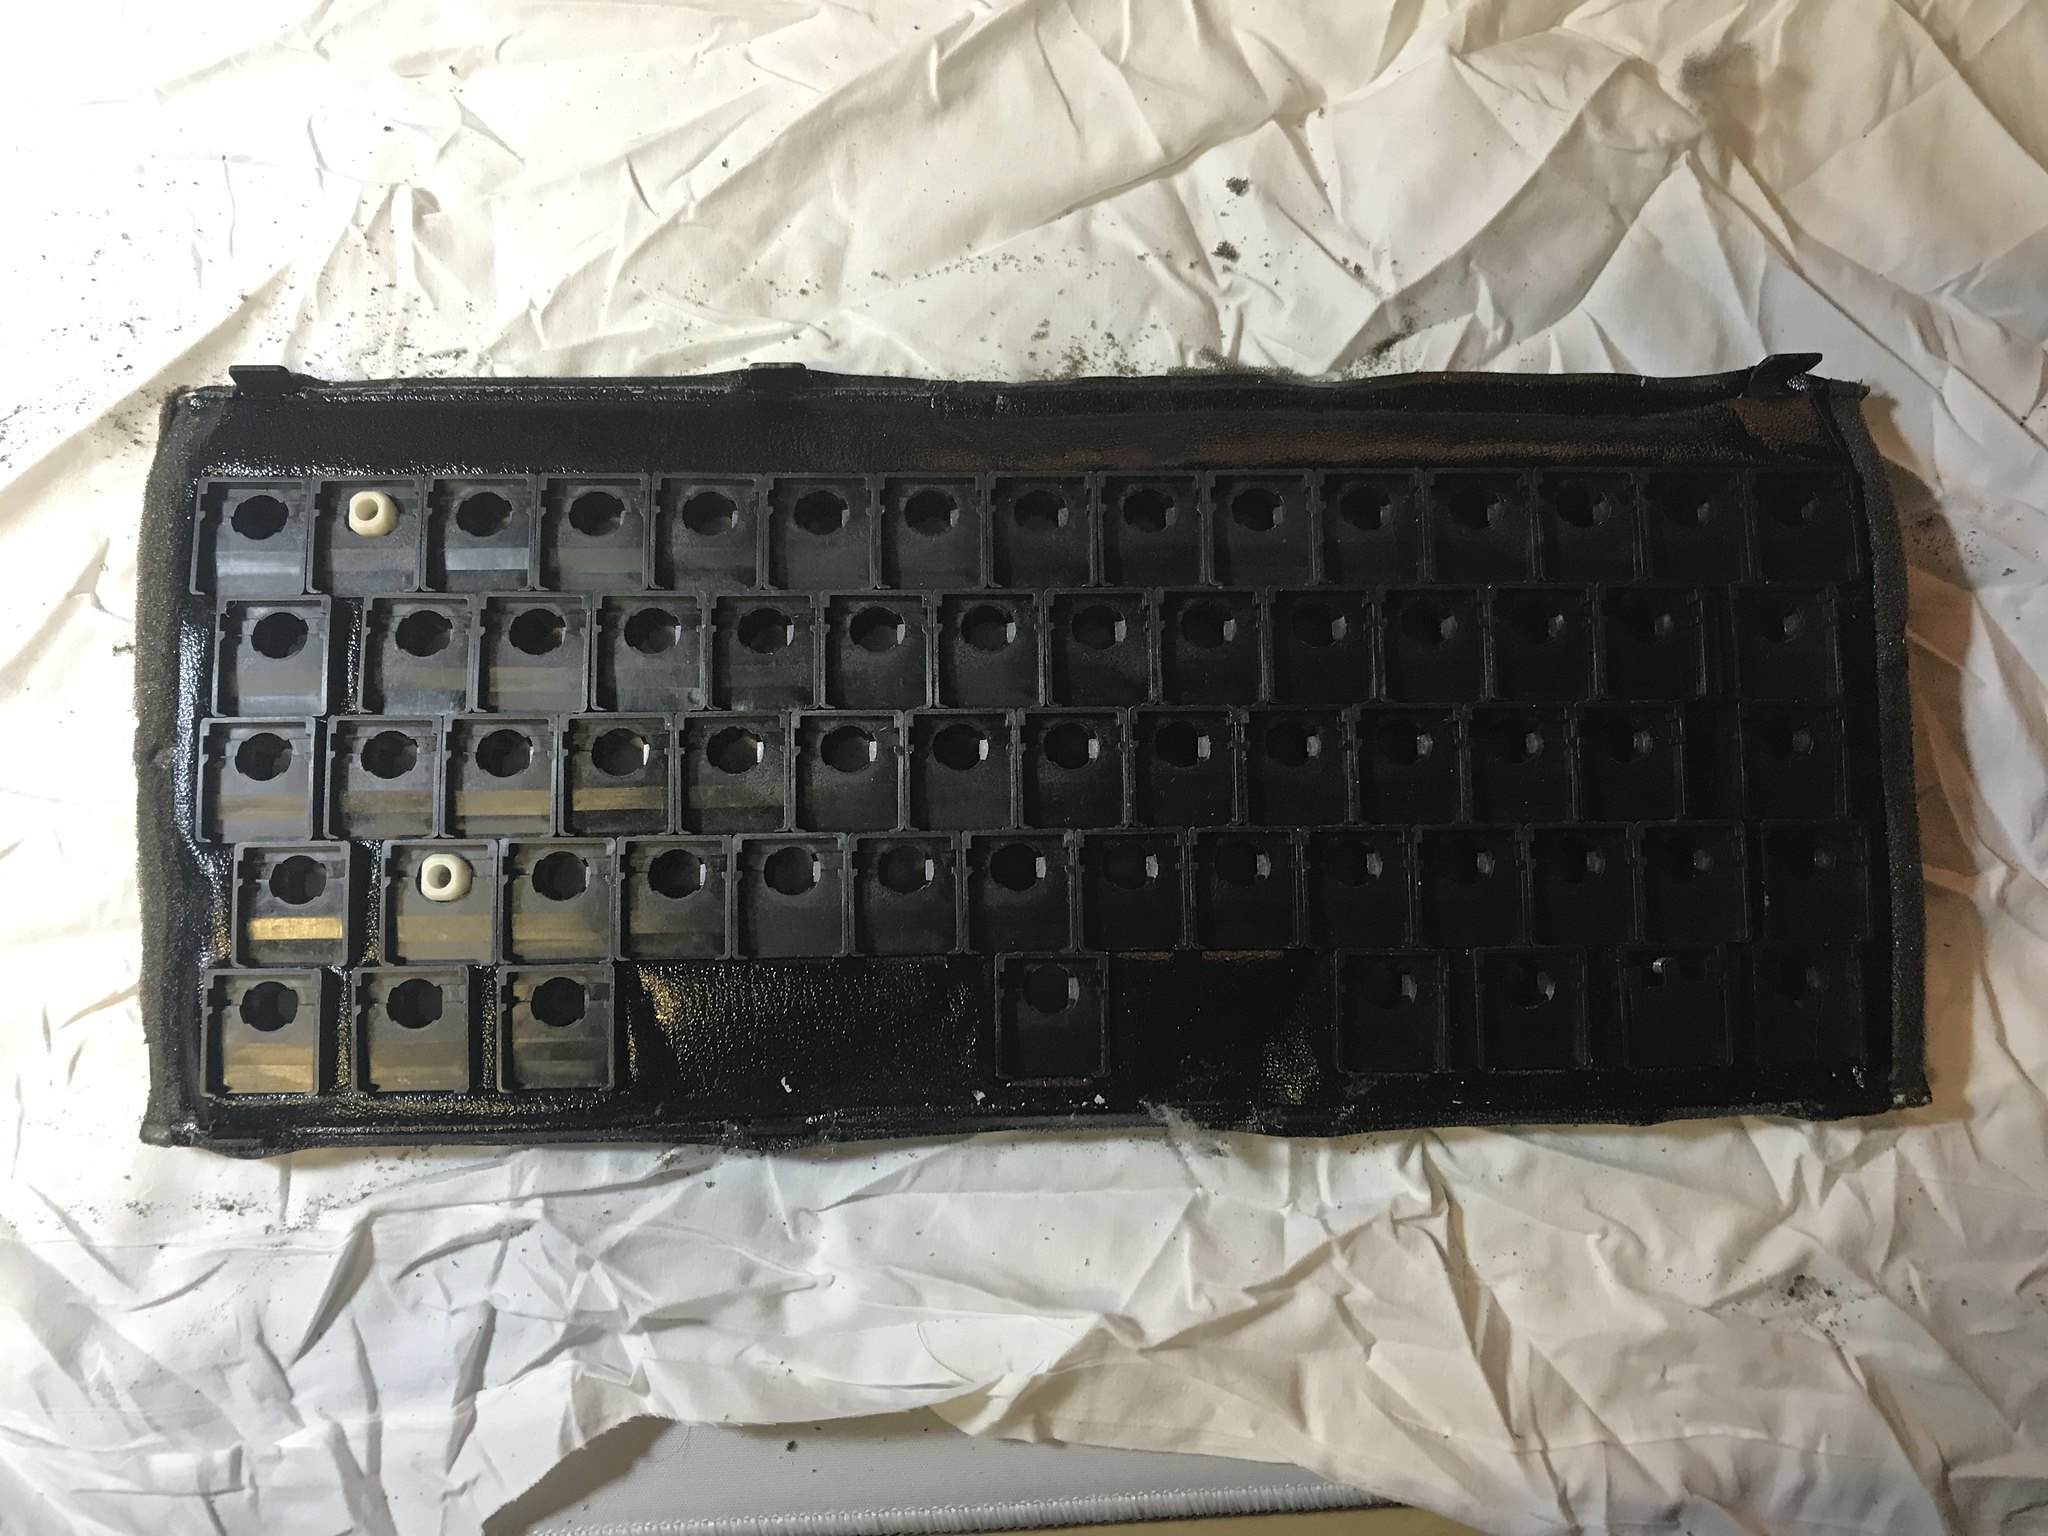
Next was to remove the flippers.  I checked over them all to make sure I wasn't missing any secret alignment then removed most with tweezers.  Once i realized I was being dumb, I turned the plate over and let the rest drop out.  There were a few that didnt fall out, and were just pinched a bit but nothing was damaged. 


Following that, I decided to try and separate the foam along with the barrels.  I unhooked the foam from the plate clips and broke the foam loose from the plate at the edges.  Then i just gently worked the barrels loose from the top side and pulled the foam back at the same time.  I figured it would be easier this way instead of trying the separated them while the foam was still attached to the plate.  All in all, it worked very well.


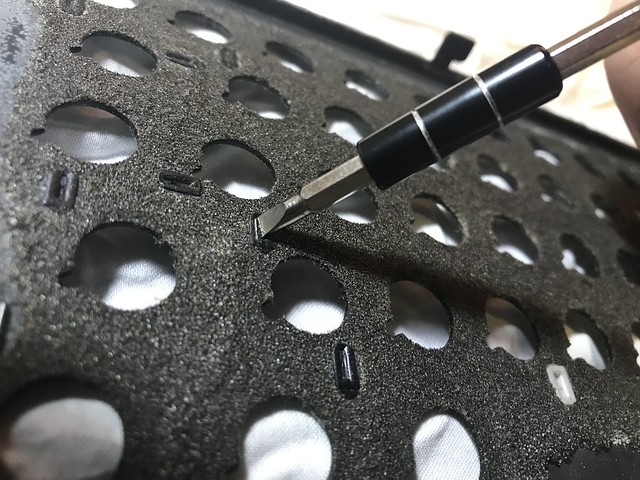
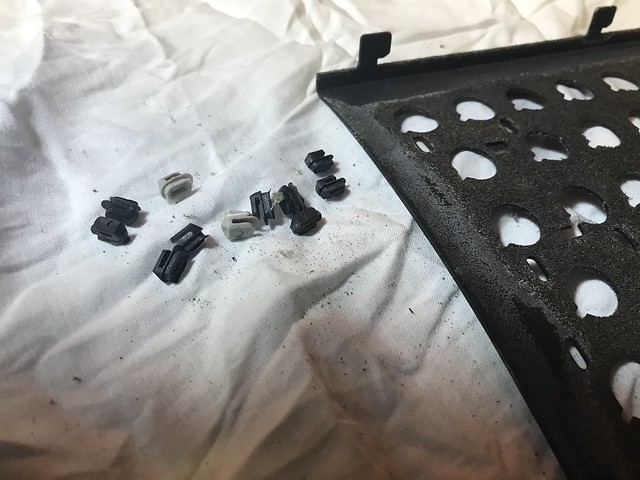
Next up I popped out the stabilizer clips, following fohat.dig's advice.  Again, wasn't sure how much pressure to use, but you'll eventually find the sweet spot and they come right out.


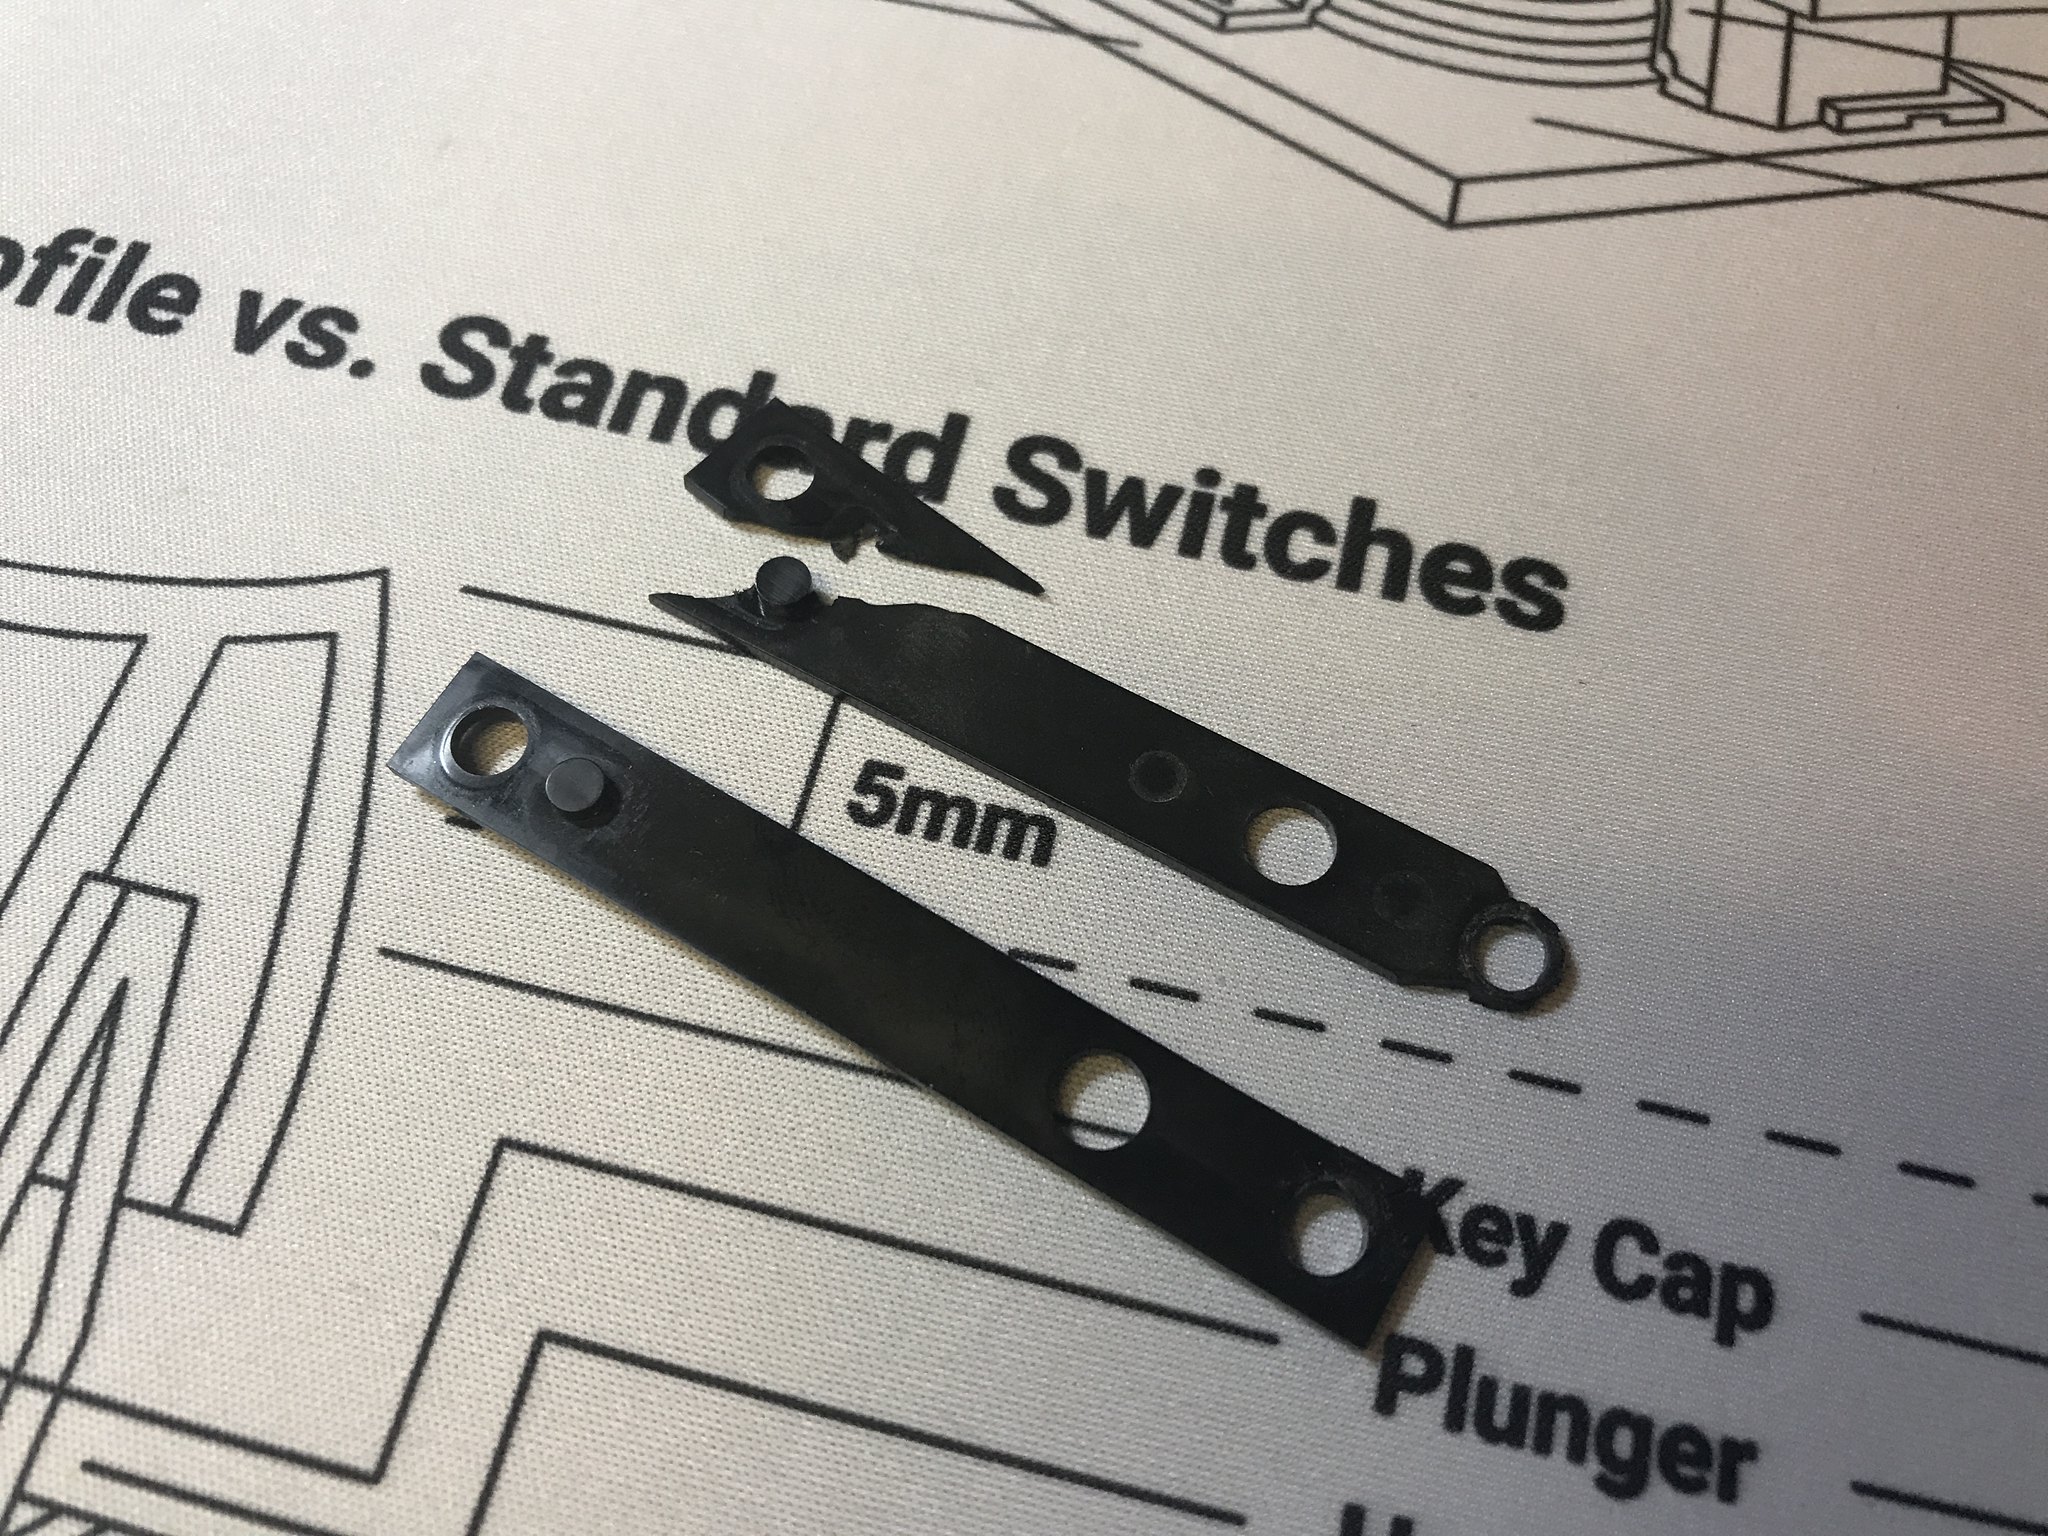
All in all everything went pretty smoothly so far.  I think I'm going to start work on the xwhatsit tomorrow, but wont be able to finish until the last component arrives.  I did find to cracked barrels following disassembly.  Not sure how big of a deal it will be, as they are not serious and all pieces are still attached.  I may use them for the spacer keys if I am unable to find cheap replacements.  Don't really want to purchase a whole Model F just for two barrels.

I think that's about it for now.  Keyset and stabilizer inserts arrived the other day.  I am going to take the plate to a cerakote location nearby tomorrow.  They quoted me 25 over the phones, so hopefully they stick to that price.  Still on the fence for a color, I don't want anything garish, but would still like something unique.  I don't think ill do pink, but have considered purple.  Not sure how it will all go together though.  I may get Jesse James Civil Defense Blue as I've always like the color.  If anyone has thoughts feel free to share.  Im not attached to anything, and will probably make the final decision at the shop on a whim lol.

Huge thanks to sixtylife and fohat.digs.  You both have been my go to for all information on this teardown.  Ive read countless other threads, but these are the two I typically come back to for reference info.

Offline suicidal_orange

  • * Global Moderator
  • Posts: 4771
  • Location: England
Re: Kishsaver Rehabilitation - Pics
« Reply #16 on: Fri, 16 February 2018, 05:38:30 »
Interesting, quite grubby but not as bad as some boards in the average office :))

Blue looks good for the plate, adds a bit of colour while not clashing with anything.
120/100g linear Zealio R1  
GMK Hyperfuse
'Split everything' perfection  
MX Clear
SA Hack'd by Geeks     
EasyAVR mod

Offline SixtyLife

  • Posts: 474
  • Location: New Jersey
Re: Kishsaver Rehabilitation - Pics
« Reply #17 on: Fri, 16 February 2018, 08:28:27 »
looking good! man I love resto logs. thanks for the detailed pics.

if the cracked barrels end up bothering you, orihalcon sells some individually on ebay for a somewhat reasonable price: https://www.ebay.com/itm/IBM-Model-F-AT-122-Terminal-Keyboard-Parts-1x-Spring-Hammer-and-Barrel-Set/272068793539
Kishsaver, JP SSK, Displaywriter SSK, 360C, HHKB Type S, X60, Jane v2, Jane v2 CE

Offline ghostjuggernaut

  • * Curator
  • Thread Starter
  • Posts: 3575
Re: Kishsaver Rehabilitation - Pics
« Reply #18 on: Fri, 16 February 2018, 22:25:06 »
looking good! man I love resto logs. thanks for the detailed pics.

if the cracked barrels end up bothering you, orihalcon sells some individually on ebay for a somewhat reasonable price: https://www.ebay.com/itm/IBM-Model-F-AT-122-Terminal-Keyboard-Parts-1x-Spring-Hammer-and-Barrel-Set/272068793539

Thanks ill probably go that route then.

Took the plate to a local shop and its off to be cerakoted.  Ended up going with Jesse James Civil Defense Blue.  They had a handgun on display in that color and I really liked it.  They tried to get me to go with socom blue, but I wanted something a bit more vibrant.  I do think that I will be making more trips there in the future.  Price was very fair and affordable.  Ive got the barrels in an ultrasonic bath for now.  Might run it through a few cycles and see how they clean up.

Offline ghostjuggernaut

  • * Curator
  • Thread Starter
  • Posts: 3575
Re: Kishsaver Rehabilitation - Pics
« Reply #19 on: Mon, 28 May 2018, 19:44:08 »
Cerakote took forever on the plate.  During the curing stage, their equipment broke and they had to redo it.  Somehow all this took about 2 months, give or take.  ¯\_(ツ)_/¯

Unfortunately didnt take many pics during the reassembly, but I will put a link of the foam I used when i get a chance.  Anyway, here are the assembled pics.  I still need to install the xwhats it and test it all, but was too excited and decided to put it all together and see how it looked.  Going to have to get a monotone keyset I think, not a fan of the two tone blanks.


Plate was done in Jesse James Civil Defense Blue.  And stabilizer clips were reinstalled before caps were installed.


For some reason im missing one of the 1.5 caps which can be seen on TAB.  Ill sort that out eventually.

Ill post some better pics in the future when I get its 100%.  I was originally going to build the xwhatsit myself, but ran into some issues.  After the second round of SMD work, i said fk it and ordered an assembled one.  Ill still put together a list of parts and share it for anyone that is interested in going that route.

Offline iamtootallforthis

  • Something a lot Funnier
  • * Global Moderator
  • Posts: 4739
  • Location: West Palm Beach, FL
  • I like green stuffs.
    • WTB/WTTF Thread
Re: Kishsaver Rehabilitation - Pics
« Reply #20 on: Mon, 28 May 2018, 19:48:45 »
Cerakote took forever on the plate.  During the curing stage, their equipment broke and they had to redo it.  Somehow all this took about 2 months, give or take.  ¯\_(ツ)_/¯

Unfortunately didnt take many pics during the reassembly, but I will put a link of the foam I used when i get a chance.  Anyway, here are the assembled pics.  I still need to install the xwhats it and test it all, but was too excited and decided to put it all together and see how it looked.  Going to have to get a monotone keyset I think, not a fan of the two tone blanks.

Show Image

Plate was done in Jesse James Civil Defense Blue.  And stabilizer clips were reinstalled before caps were installed.

Show Image

For some reason im missing one of the 1.5 caps which can be seen on TAB.  Ill sort that out eventually.

Ill post some better pics in the future when I get its 100%.  I was originally going to build the xwhatsit myself, but ran into some issues.  After the second round of SMD work, i said fk it and ordered an assembled one.  Ill still put together a list of parts and share it for anyone that is interested in going that route.

Jesus man that's clean as ****.

Congratulations again on finding one again

Offline donut_sauce

  • Posts: 390
Re: Kishsaver Rehabilitation - Pics
« Reply #21 on: Mon, 28 May 2018, 19:57:27 »
Looks great,  very inspiring! Thanks for sharing all this info

Offline nmur

  • ಠ_ಠ
  • Posts: 1539
  • Location: Sydney
Re: Kishsaver Rehabilitation - Pics
« Reply #22 on: Mon, 28 May 2018, 20:17:09 »
love restos, nice job dude

Offline aya3154

  • Posts: 71
Re: Kishsaver Rehabilitation - Pics
« Reply #23 on: Wed, 30 May 2018, 12:34:15 »
That nudeshot tho :cool:
the 2 month wasn't cool but wow that plate looks :eek:

Offline Signature

  • master of puppers
  • * Marketplace Moderator
  • Posts: 1914
  • Location: Sweden
  • snoozing
Re: Kishsaver Rehabilitation - Pics
« Reply #24 on: Thu, 31 May 2018, 15:38:14 »
Cerakote took forever on the plate.  During the curing stage, their equipment broke and they had to redo it.  Somehow all this took about 2 months, give or take.  ¯\_(ツ)_/¯

Unfortunately didnt take many pics during the reassembly, but I will put a link of the foam I used when i get a chance.  Anyway, here are the assembled pics.  I still need to install the xwhats it and test it all, but was too excited and decided to put it all together and see how it looked.  Going to have to get a monotone keyset I think, not a fan of the two tone blanks.

Show Image

Plate was done in Jesse James Civil Defense Blue.  And stabilizer clips were reinstalled before caps were installed.

Show Image

For some reason im missing one of the 1.5 caps which can be seen on TAB.  Ill sort that out eventually.

Ill post some better pics in the future when I get its 100%.  I was originally going to build the xwhatsit myself, but ran into some issues.  After the second round of SMD work, i said fk it and ordered an assembled one.  Ill still put together a list of parts and share it for anyone that is interested in going that route.
Heck ya! SMD is a pain in the ass even if you ain't got hot air, but board looks good as new :D
Very busy with studies atm.