I started working on the second and hopefully final case.
I used computer assisted drawing, also known as CAD or more concretely Sketchup.
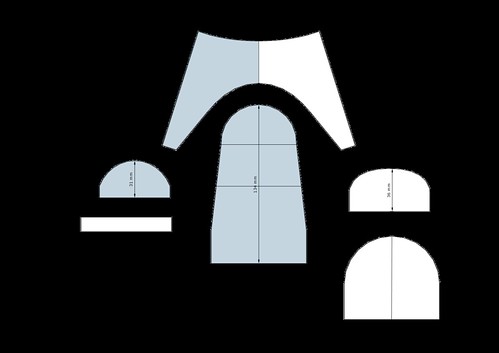
I modeled the mouse in 3D and then painstakingly unfolded it.
This resulted in a shell that could be made of one piece of wood, but in practice of two.
Balsa usually comes in 10x100cm pieces.
I first failed miserably at clamping the shell to the ribs, so I bought super glue and tried again.
Wood glue is so much nicer, but keeping the wood firmly in place is tricky.
With super glue, you can just use your hands to hold the shell in place for a minute.
Trust me, after two days your fingers will be back to normal.

This time I also spent more time sanding the palm rest into shape.
It took a while, but the result after gluing them together is rewarding.

This time I can't just glue everything to the base plate, so I had to come up with a way to open it.
I used epoxy glue and some triplex triangles to glue nuts to the inside of the mouse.
Then I drilled holes in the base plate, and small dents using a larger drill.
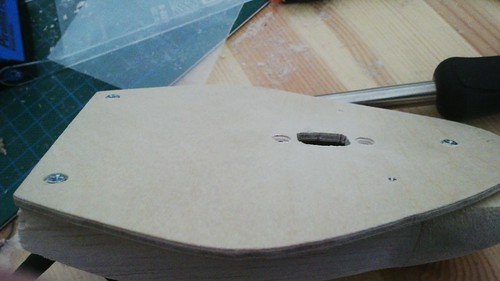
The hole for the laser is made by drilling a hole, and putting a jigsaw in the hole.
You can then just saw a shape and loosen the jigsaw.
Note that I messed up the alignment of the two original rear holes I planned initially.
Adding another hole close to an existing hole is ugly and a recipe for disaster.
Instead, I made a new hole in the palm rest.
I screwed in the front screws, and drilled right trough the base plate into the palm rest.
Then I used a larger drill on the palm rest to embed a nut in the rest.
As long as you don't get epoxy on the inside of the nut, this can't go wrong.
More photos are again on Flickr.
The next step will be to attach the mouse buttons, and then insert the electronics.


