Sorry, I need to actually get back and finish this, had some health issues to deal with.
I am planning to release the files, including just a small snippet on the hot swap for those who want to use it in their designs. It works REALLY well.
What printer I use and how takes some explaining.
I design and build my own printers, I have several but my primary is an 18 inch commercial grade corexy and contrary to what you may expect none of my printers have a heated bed. The idea that you need a heated bed is is a fallacy the industry and users have created, you don't, heated beds certainly help with high shrink materials but when you get to sizes like 12inches or more, even PLA will shrink enough to lift, but what many miss is that a heated bed can cause just as many issues as it helps, not to mention that much power creates all sorts of cost, safety and/or power issues which are even worse at larger scales. If you know ways around it, why bother?
Also another issue with big printers is the print surface. Those fancy coated magnetic beds are nice but they aren't flat and this is a problem that gets worse with scale, and then there's the cost, it's insane what they want for one this size, not to mention if you damage it, which the larger it is the easier it is. Same goes for Borosilicate, I've broken a lot of expensive Borosilicate, I am sooo done with Borosilicate. My primary simply uses a 1/2in tempered glass tabletop and a simple Elmer's (white) glue stick, with MANY thousands of hours I've never had a problem.
So how do you do it especially without a heated bed?
First, you may not need heat to begin with for smaller things, people often just assume they need it because they were sold one or were told by plastic makers (though if you have a textured bed you will need it). I do PETG, small ABS, PLA and TPU, and some nylon, admittedly ABS is a hassle and I do it as little as possible but that has to do with ABS delaminating, not the heated bed being the issue. Yes, it can make some things easier, but again, it makes it more complicated. Once tuned yes, it can be easier, but first time you have a problem you're back to messing with it. Is that print issue the bed, the nozzle, the extruder or.... meh. Keep it simple! I don't even use rafts or skirts. Yes, I know, I'm very much a minority on all of this but I've been doing this longer than most, it does work, it just has a different learning curve.
Make sure your bed is flat and/or you have mesh leveling to ensure proper adhesion. This is where glass shines, those magnetic beds are horrible for flatness so your z axis needs to be always hunting to keep the nozzle at the correct height or else it will just not stick well. Don't forget this adds wear and tear and to the print time.
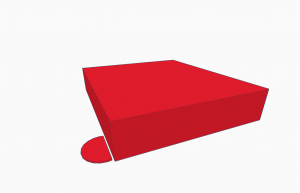
I start with lilly-pads (there is multiple names for it), put a thin disk, I use 10mm radius 0.5mm high pads with a 0.1mm or smaller separation gap (use half your tolerance) between the part and the pad, this way you retain a solid wall once it breaks away. Most people who use these put no break line, and when they remove them not only is it more difficult but it leaves the inner honeycomb exposed. This leaves a nice normal wall and usually breaks away clean.

If that fails to hold you take hot glue or CA (super glue) and glue those to the bed. Beware, on high shrink plastics this can bend or snap your bed glass while printing, never mind removal. I broke 1/4in Borosilicate plate this way. The nice thing here is you can salvage a print if it lifts a little as the pad will lift before the print and allows you time to glue it back down. CA holds better but cleanup is worse (do not use it on Boro!) and takes longer to cure, hot glue holds within a second or two so you aren't stuck sitting there holding it wondering if the glue has set yet. When doing the test prints with PLA I didn't use glue, but I did need it for PET.
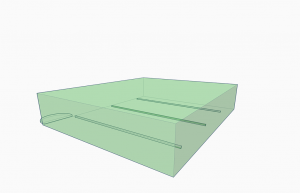
If that still isn't enough, which is pretty rare (I didn't need this for the keyboard), you can insert relief channels into the part. Make a solid floor and walls, but from there place a 2 layer thick, .2mm wide slot inside the part to relieve the tension as it prints. As shown here. Keep just enough wall to hide this. The impact on strength is negligible. Basically as the plastic shrinks it pulls more and more for each layer, hence lift, this gives it a chance to relax as only the sidewalls are now pulling and they don't have enough strength to overcome bed adhesion. This gives a chance for the rest to relax and set before continuing on, and from here the entire print lacks the leverage to pull up the print no matter how much shrinkage you have. TL/DR you're you're reducing the amount of pulling power at each end of the print.
This is a good tactic if you're doing production runs since you put them in once and never have to deal with it or cleanup again, but they are more difficult to place and if the print lifts you can't use these to save it, so pads are still recommended.
